
Fretfind
FretFind2D is a two dimensional fretboard design tool. FretFind2D doesn’t just calculate fret spacing. It models the entire fretboard, strings and frets, as a system of line segments on a two dimensional plane, ready to download and print.
For normal Guitars the simple options are totally enough. If you want to work with multiple scale lengths and non-parallel frets, turn on the extended mode.
The guitar
All these ideas and concepts are applying for everything between ukulele and guitar. Partly even for violins. So this collection covers many more string instruments than just guitars.
We will walk over all parts of the guitar. Beginning from the head and ending with the body. For every part you will find a collection of different options. Some are easier to build, some others sound better. Some are realizable just by collecting the right trashes, some others require some shopping. None of them aims to guide you to a high-end instrument, as you can buy them from professional luthiers (guitar builders). But you should get a well playable, self-made instrument with a very individual style.
What is important to start?
If you never build an instrument before, get a good overview about the options, gather informations and then just try it out. Don’t stress too much about details in the beginning.
Still, this website offers inspiration and possibilities, but is not a simple step-by-step instruction. So for a first instrument, better watch some video tutorials to get an idea, and then figure out your favourite way, with the help of the collection of this website.
Tools
Guitars
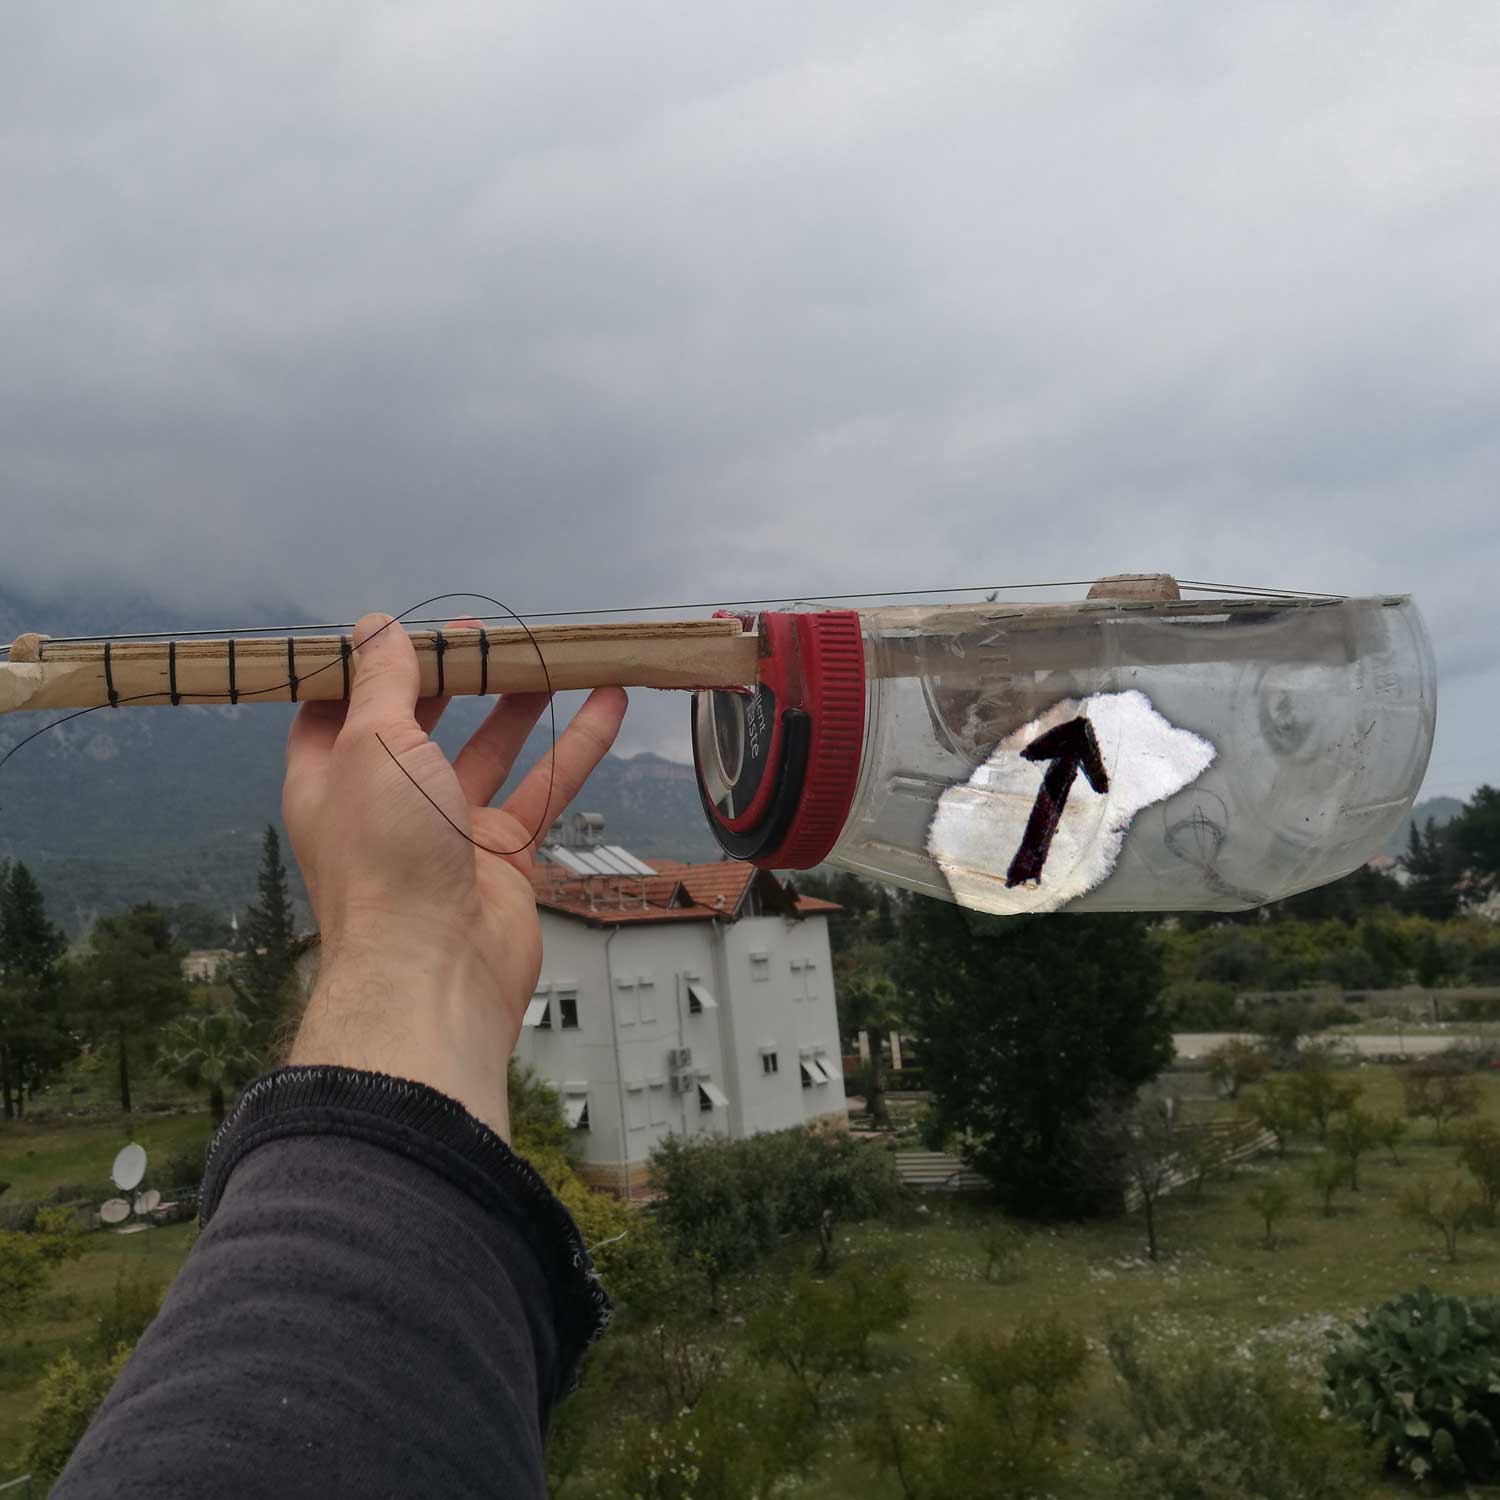
5 string bowl guitarlele
Like a 5-string guitar with a capo at the 5th fret. So you can play it like a Ukulele, but with a deeper sound.
The body is out of an old aluminium bowl, the neck from a single big piece of beech (was the only available wood). Thanks to string based frets and tuners out of wire, it was an easy and cheap projects.
- Super light for it’s size
- Very solid
- Cheap and easy to build
The head
The guitar head gives a lot of space for creativity. Depending on the tuning pegs, the tools available and your own preferences, there are various design options. But before creating crazy head forms, here are some things to consider:
- The size depends just on the amount of tuners and how you arrange them. The only thing you should take care of, is that your hand doesn’t touch the first tuner, while grabbing chords. Simulate G7 on Uke or D7 on Guitar. If they fit, the rest should be fine as well.
- The angle, between head and neck. This can be important to pull the strings down to the nut, depending on the nut form and the tuner’s orientation. Otherwise, a snaring sound can occur.

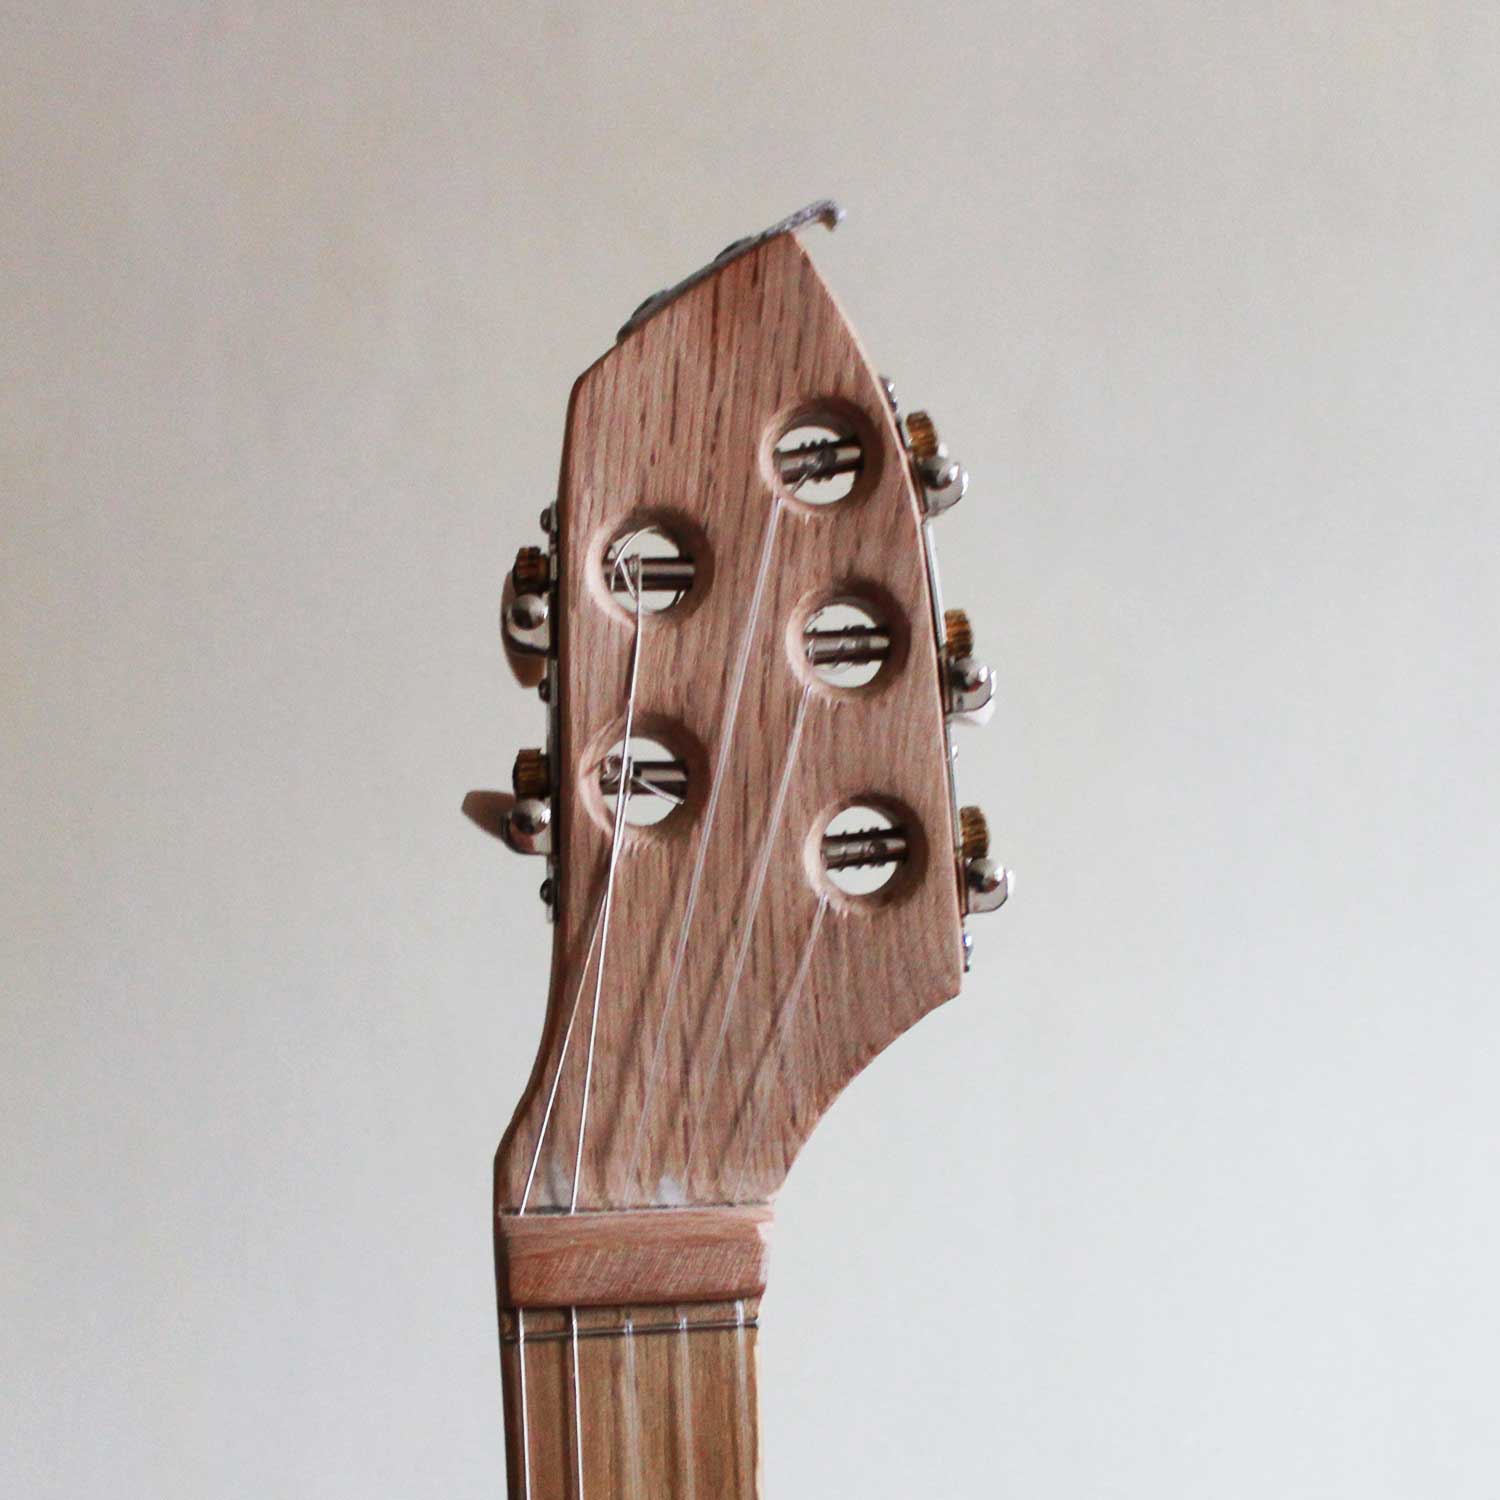

Straight head, tuners up
Head and neck are made from one and the same piece of wood.
- Very stable, as there is no potentially weak gluing point (still good gluing can be stronger than the wood itself..)
- No extra work to connect the head
- Maybe not enough pressure from the strings to the nut. If this is the case, an inverted nut could solve the problem. (check the section about nuts)
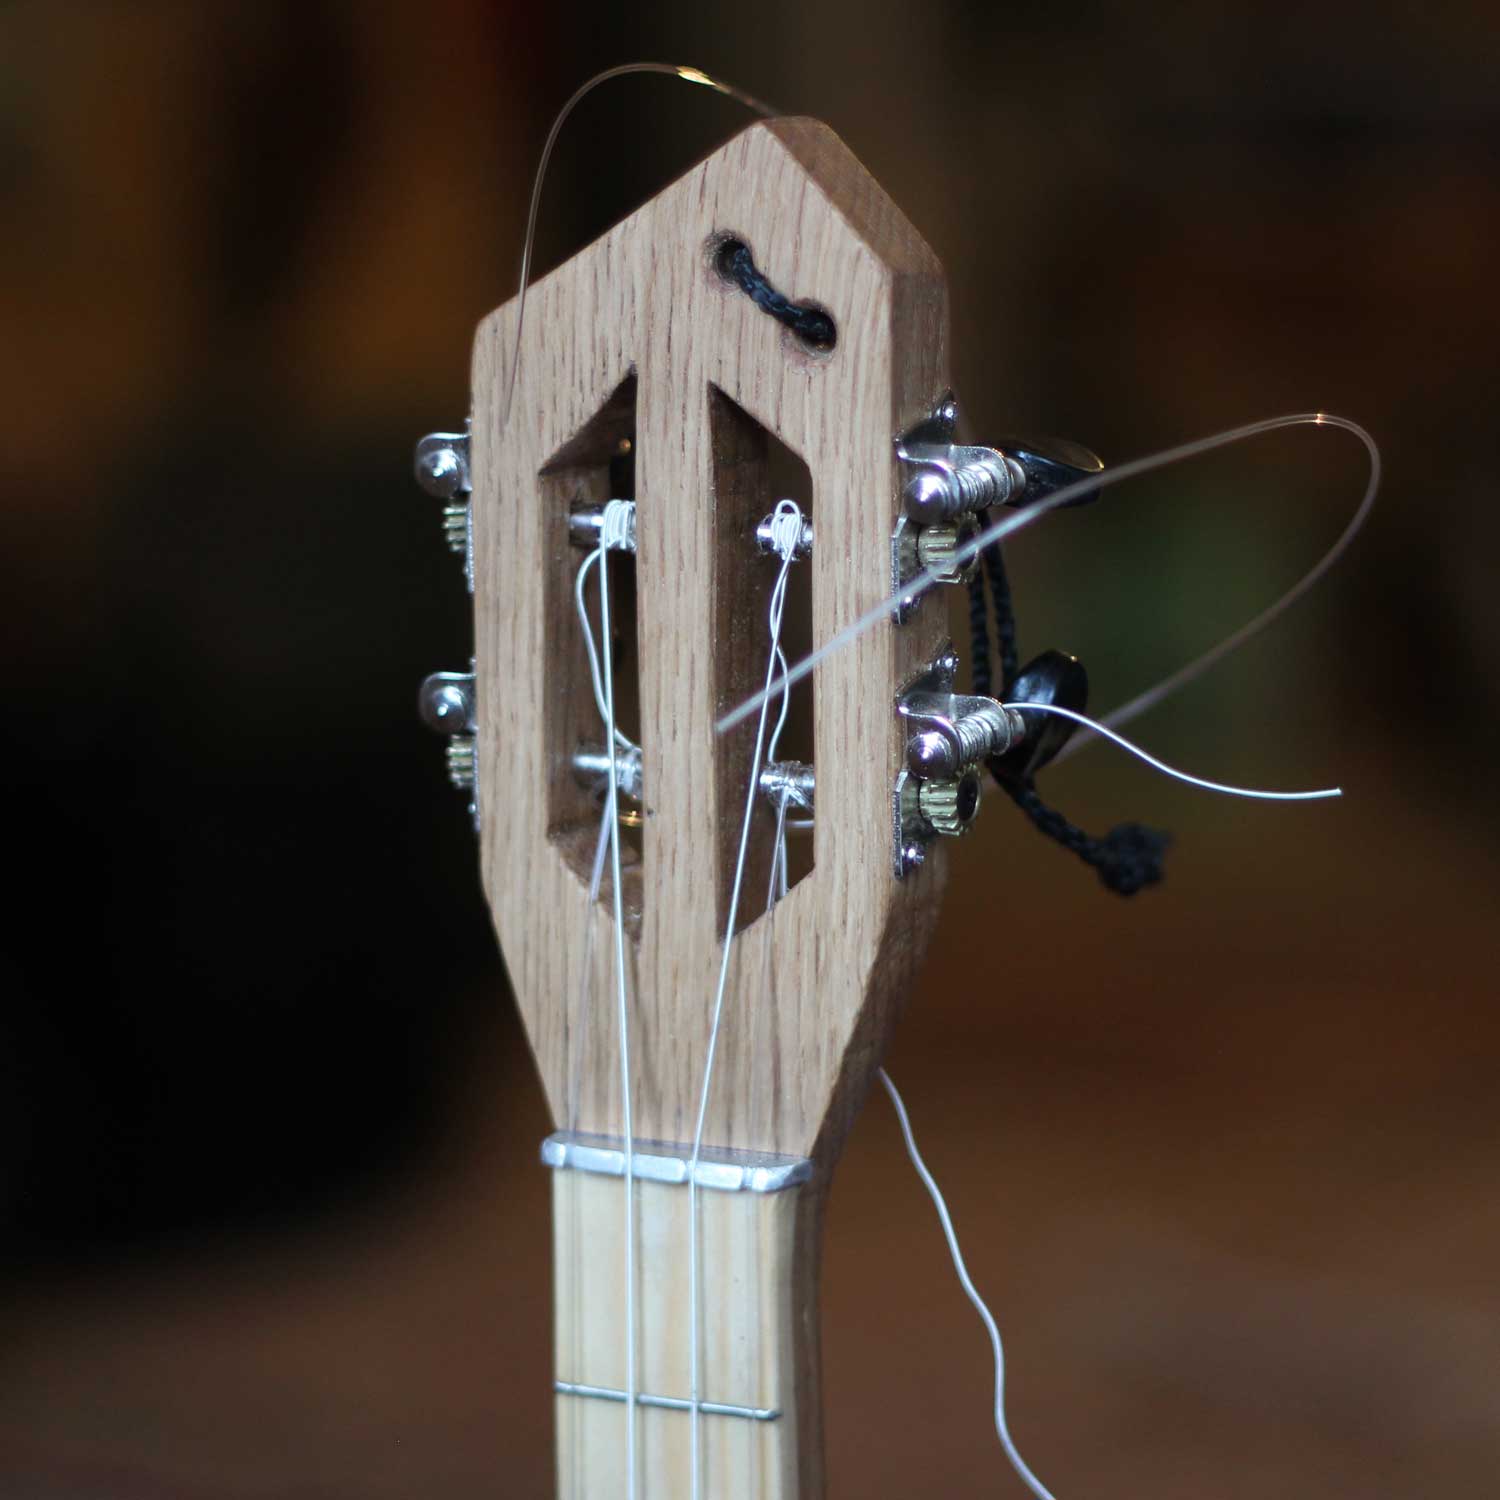
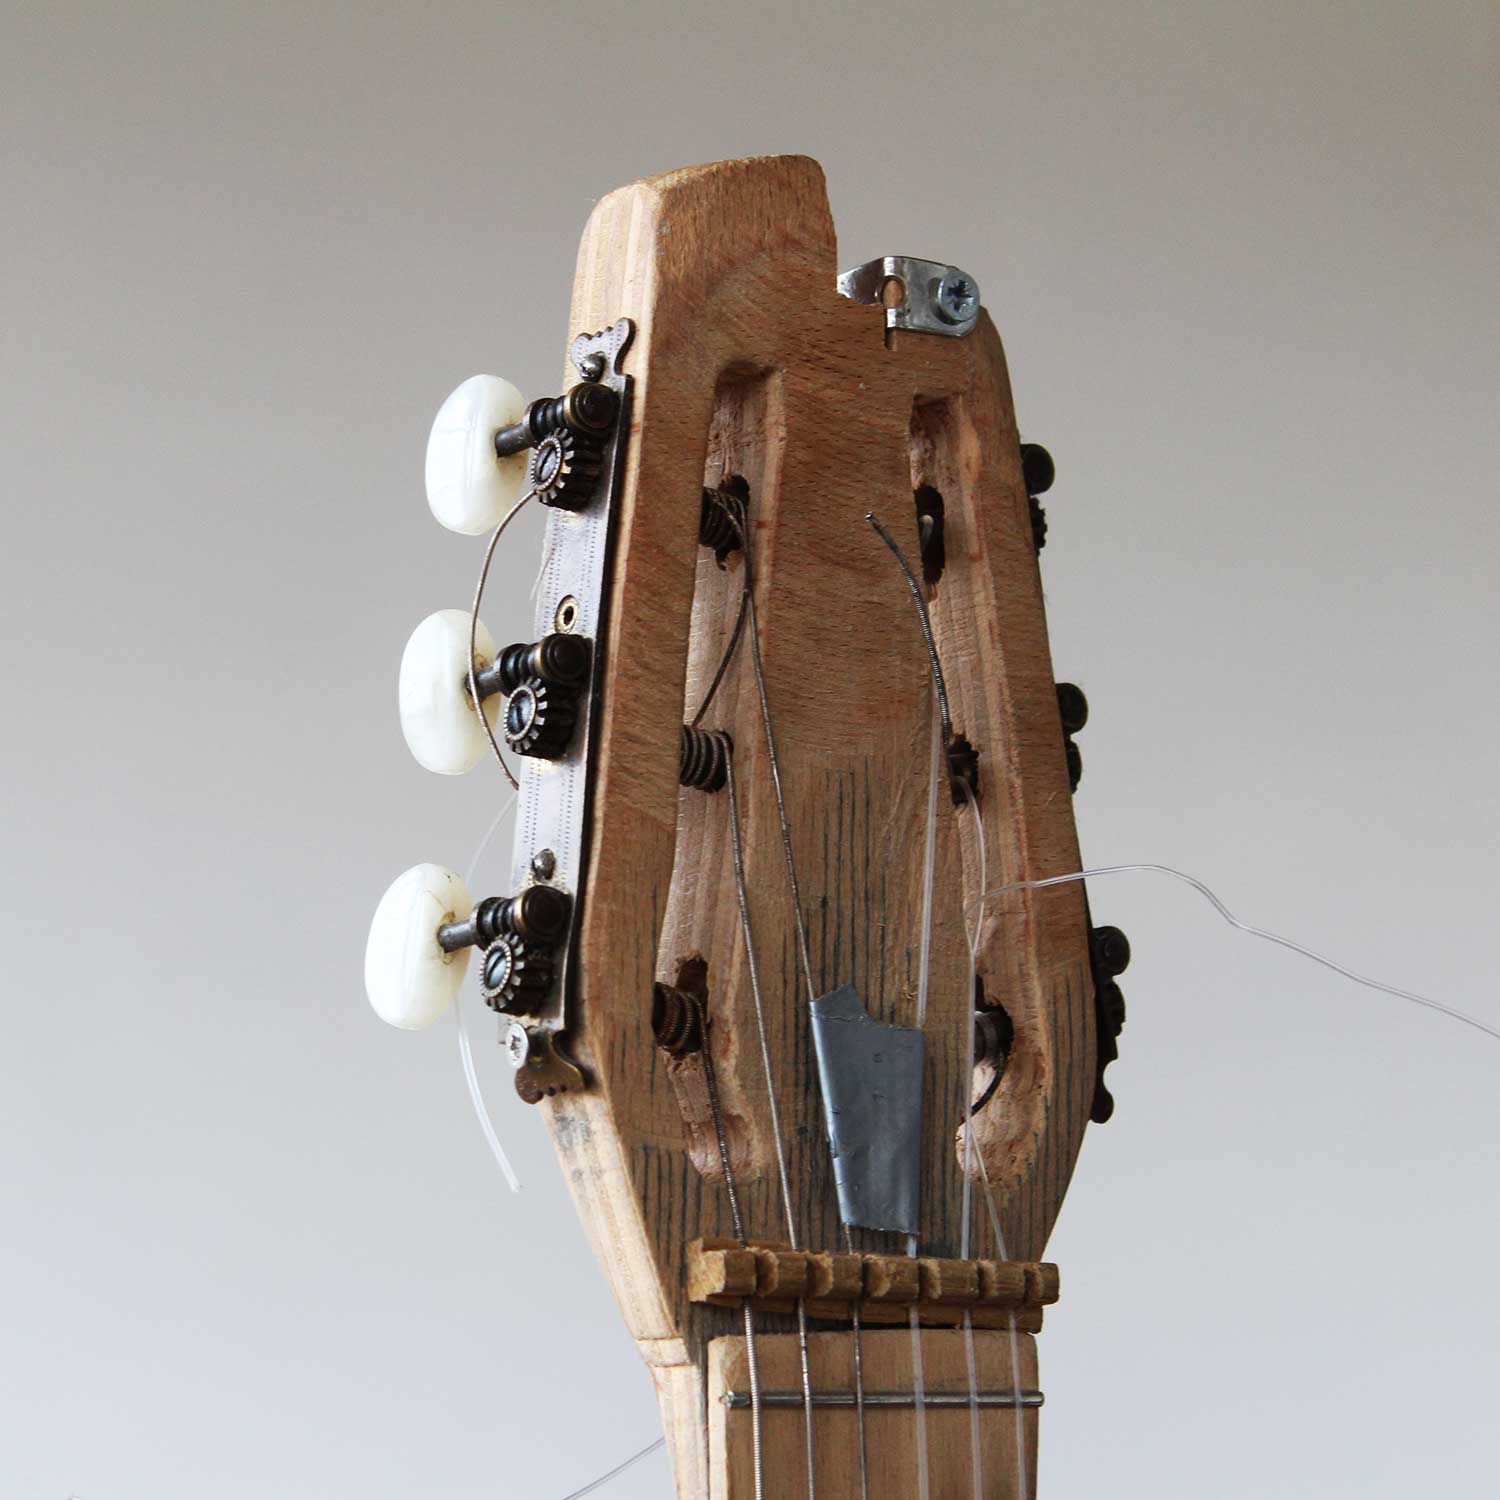
Streight head, tuners sideways
Head and neck are made again from one and the same piece of wood, but in this case, the tuners come in from the side.
- As the tuners sit a little lower, compared to the up facing orientation, the string’s tension on the nut is better.
- Might be decently more advanced to build, as you need to work a bit more precisely with the inner hole.
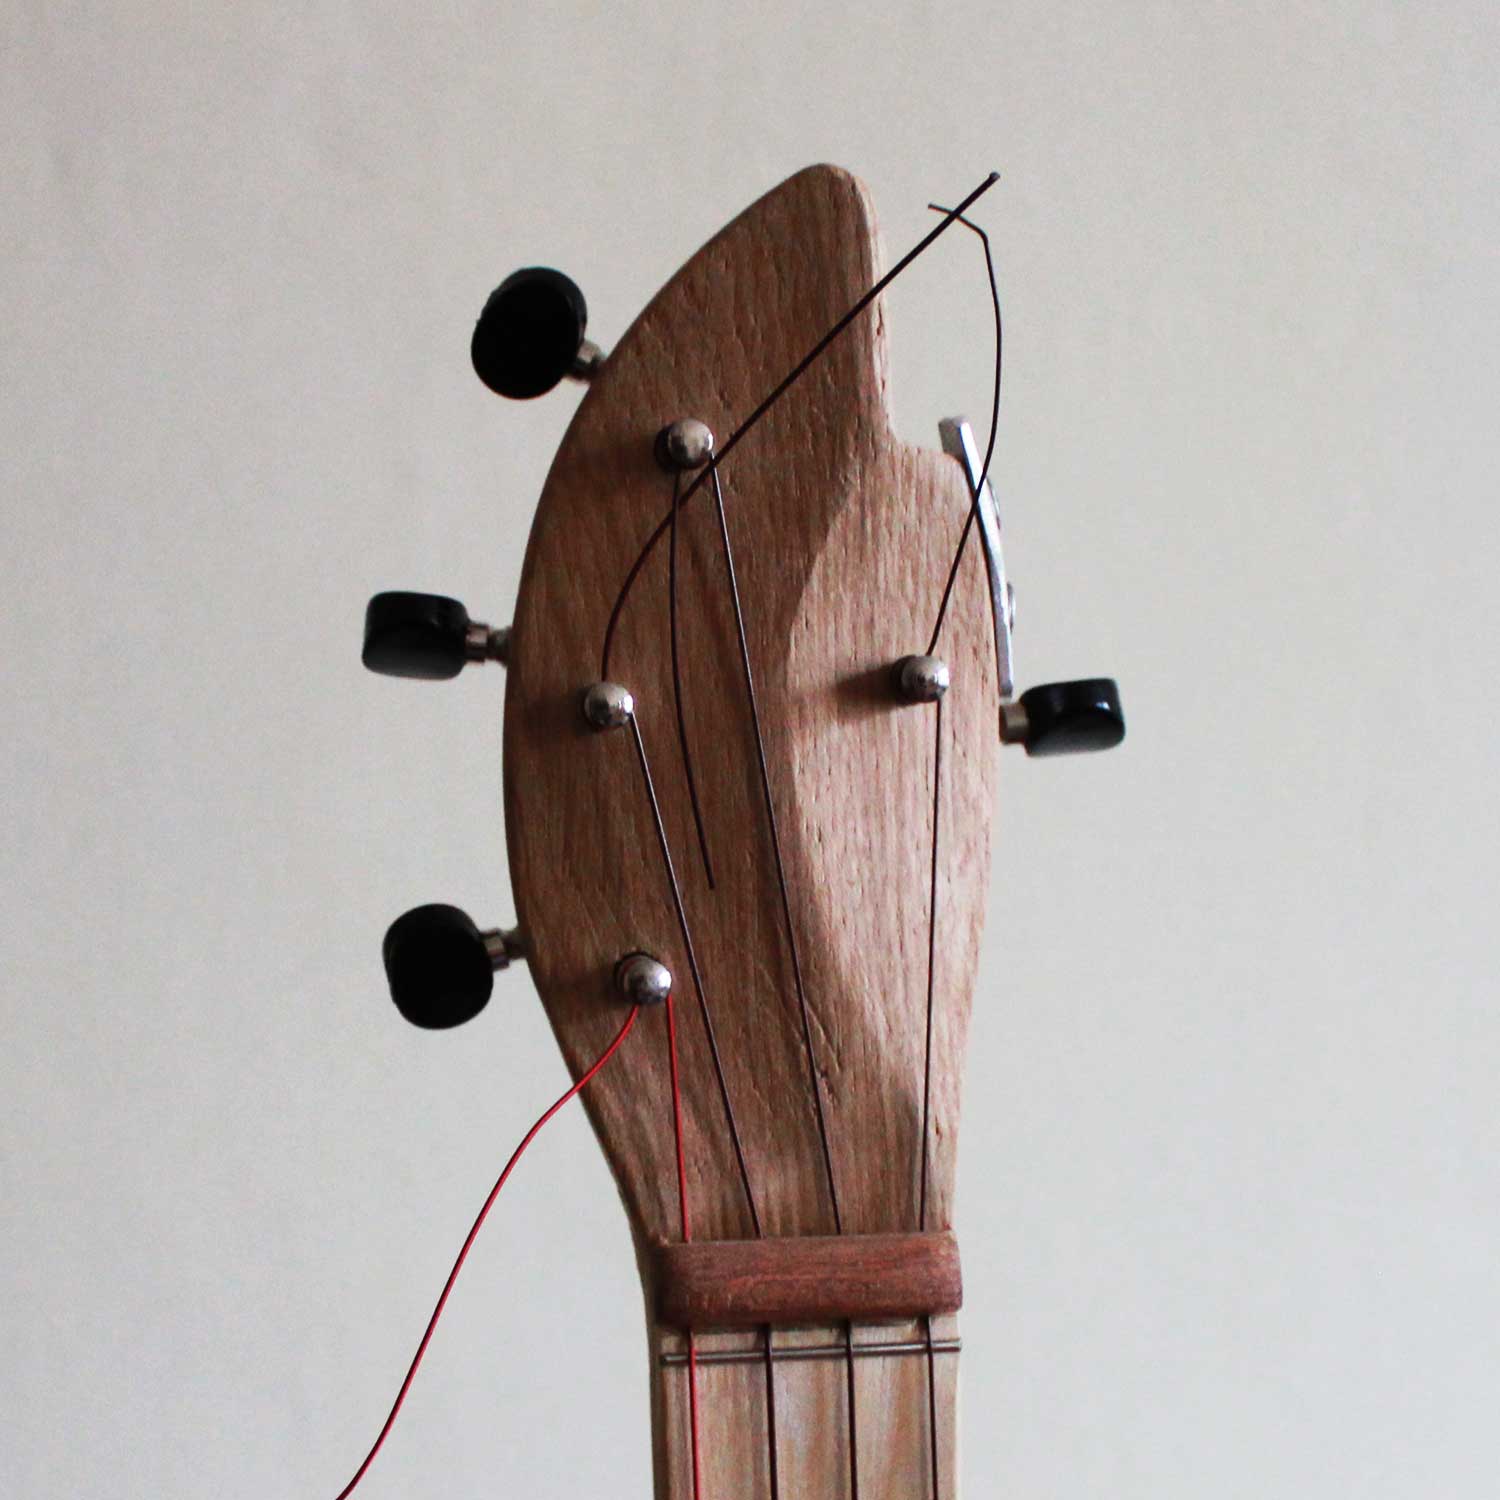
tenon connection head
Good old tenon connection… With this you can achieve the classical angled head style look, even do I never saw this used in any ‚professional‘ guitar.
- The string’s pressure on the nut is guaranteed.
- You integrate a weak spot. Although none of my instruments ever broke…
- Precise work is needed. But compared to other head connection options, it can be done with easy tools like a normal saw and a chisel.
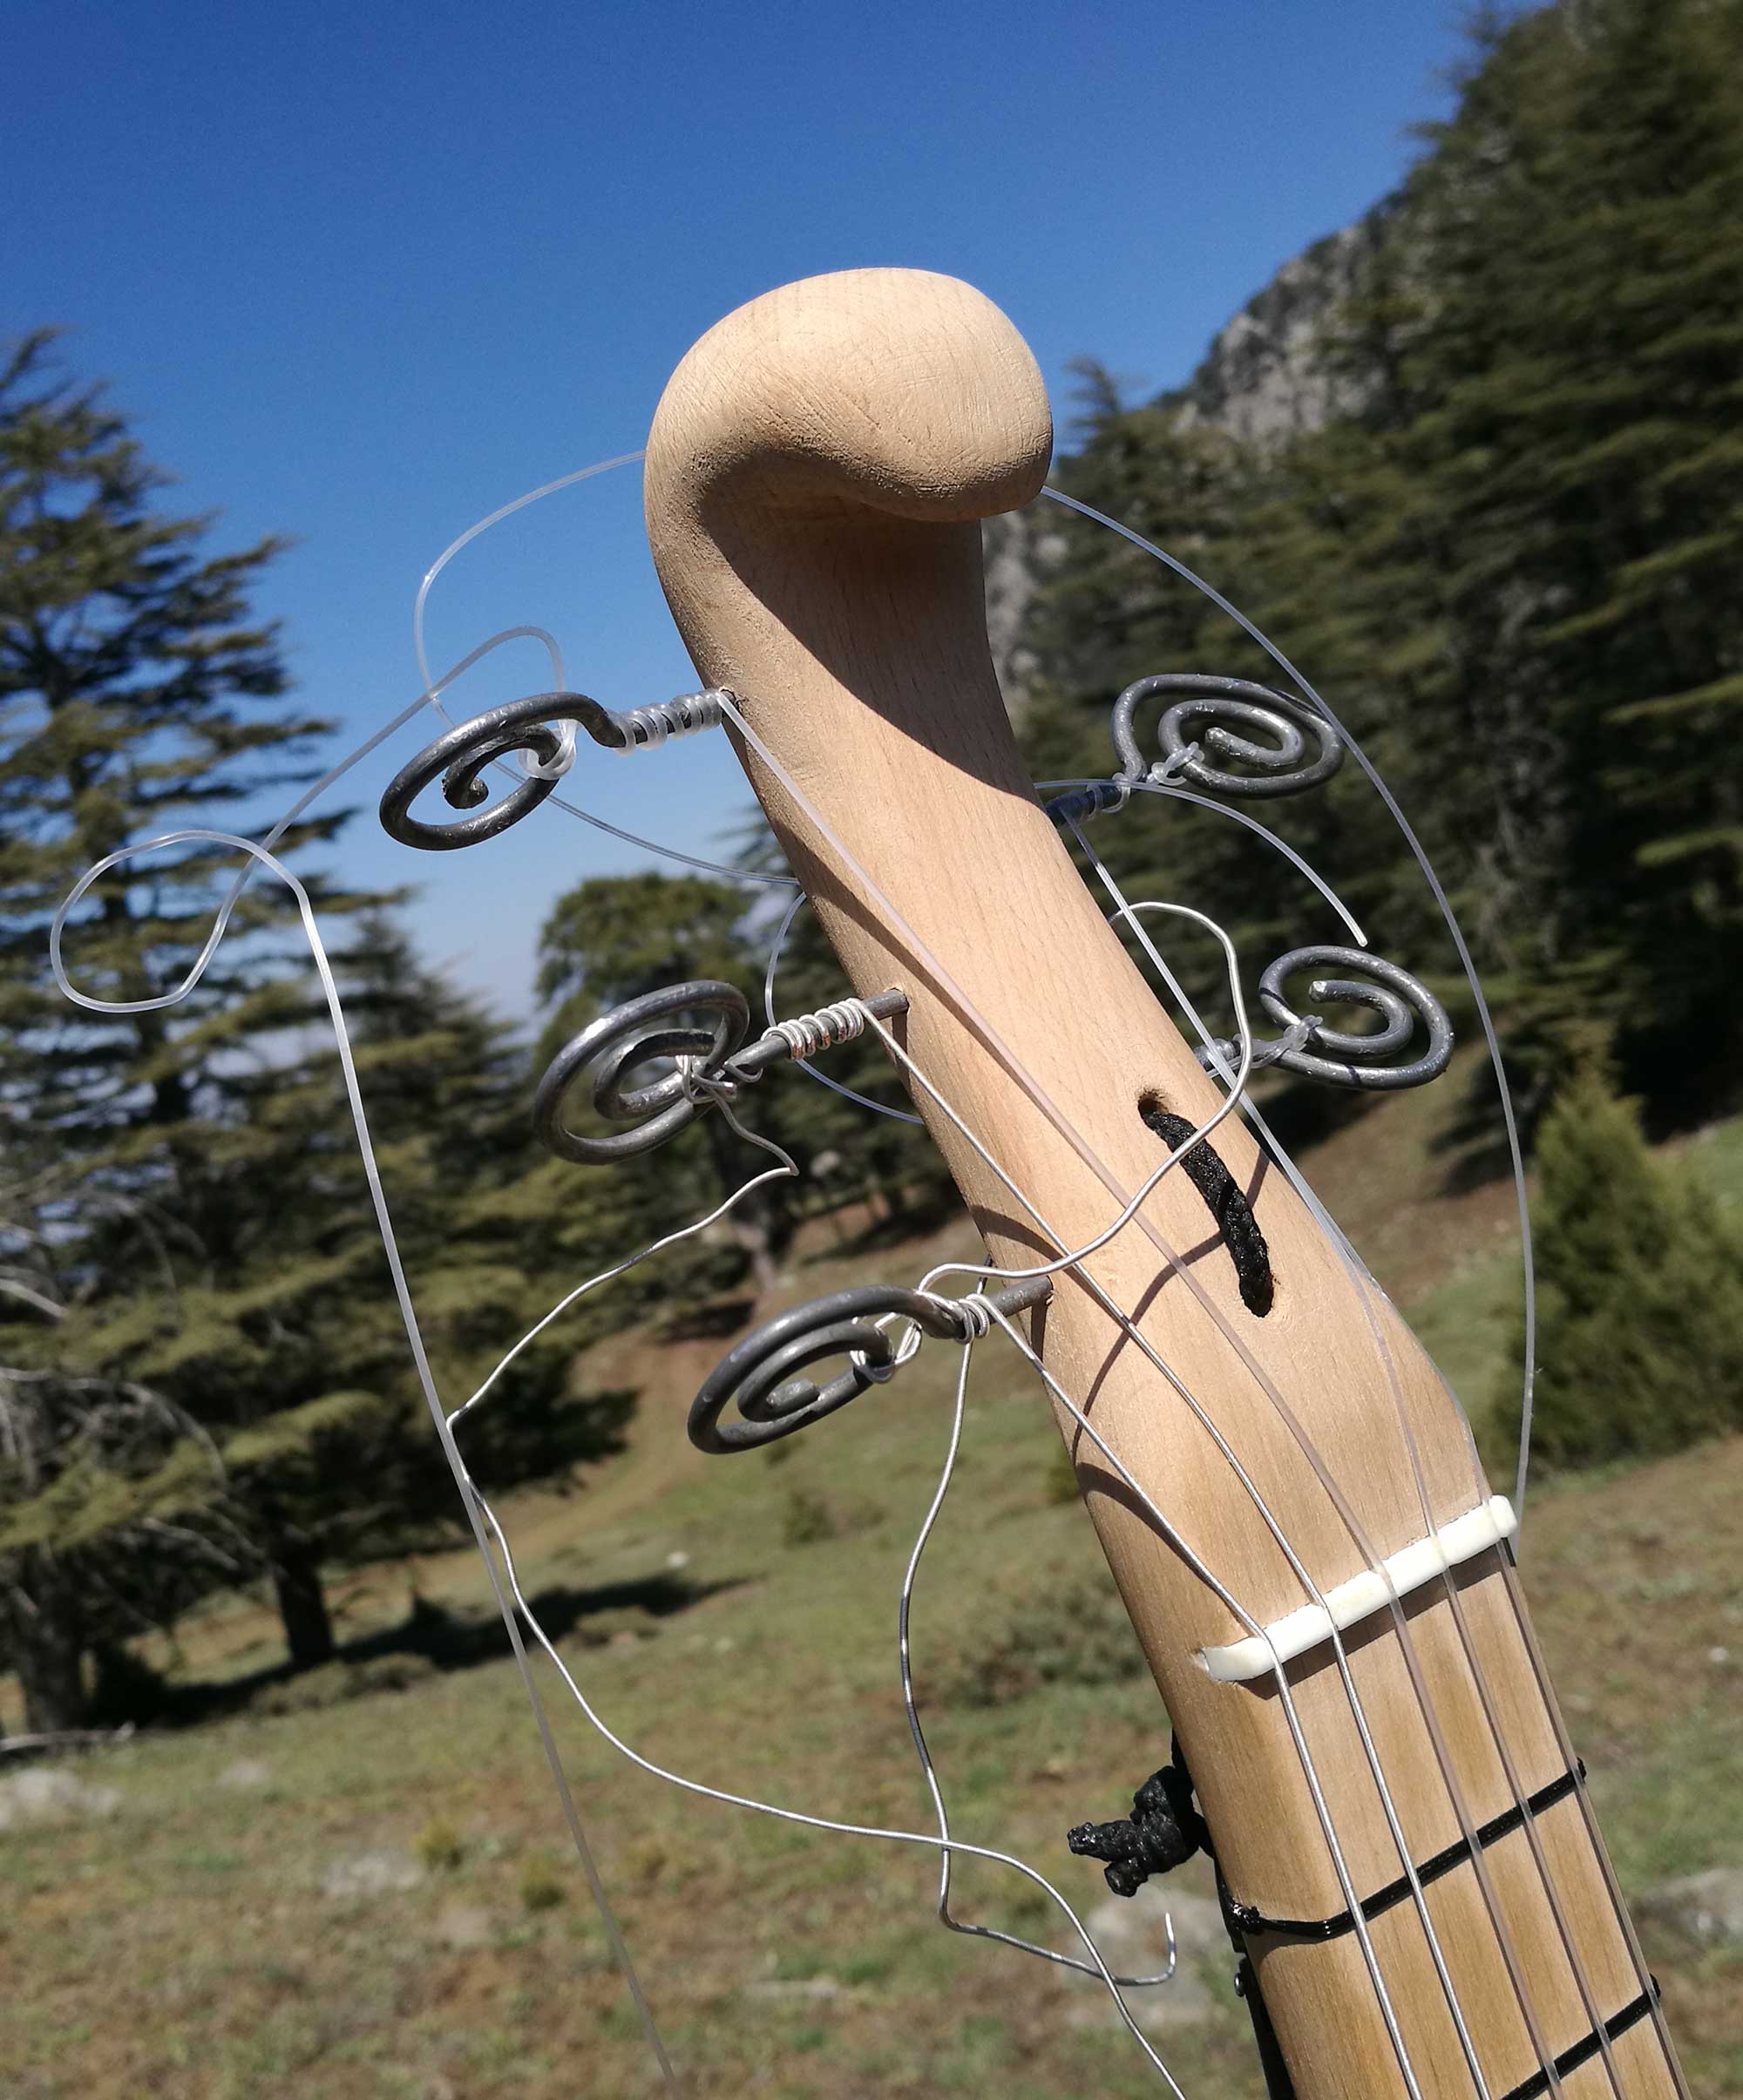
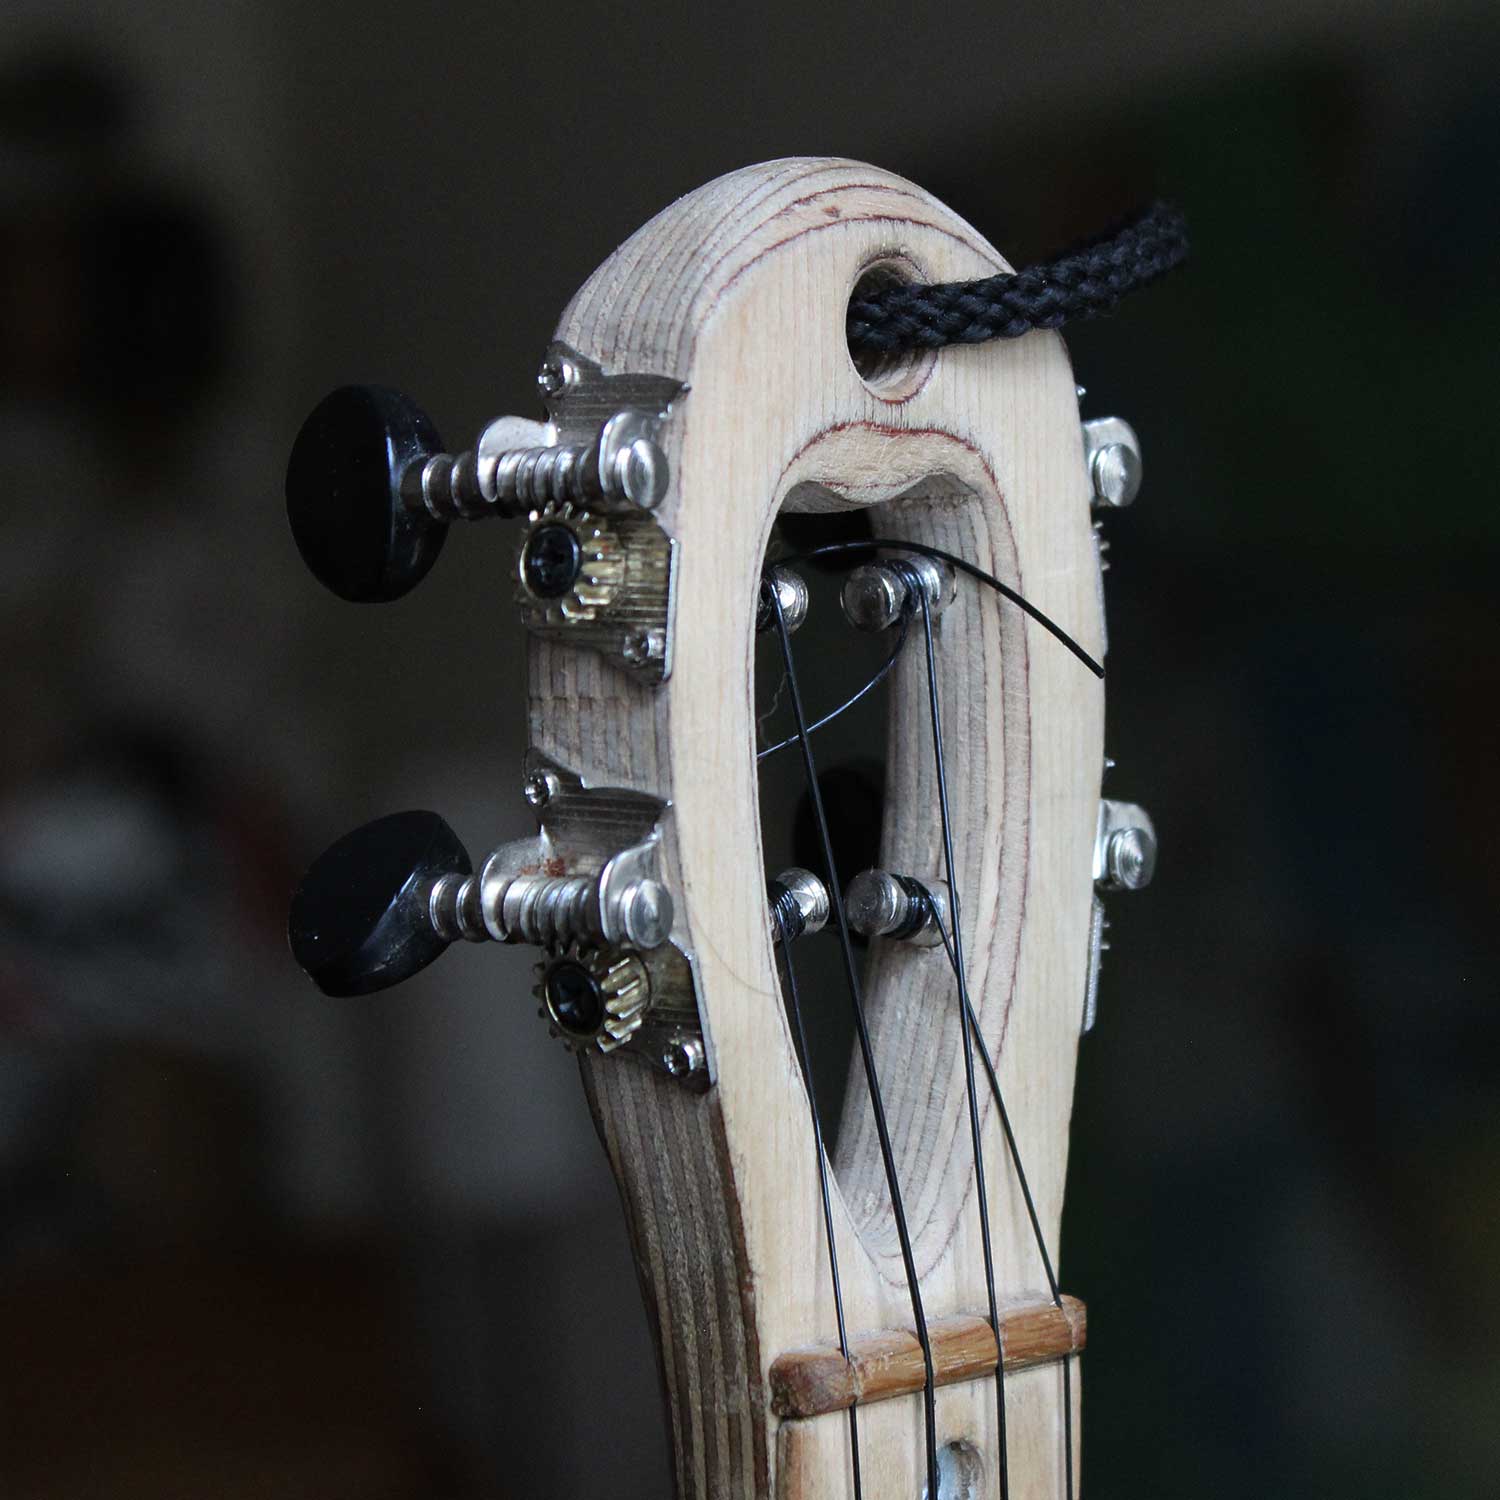
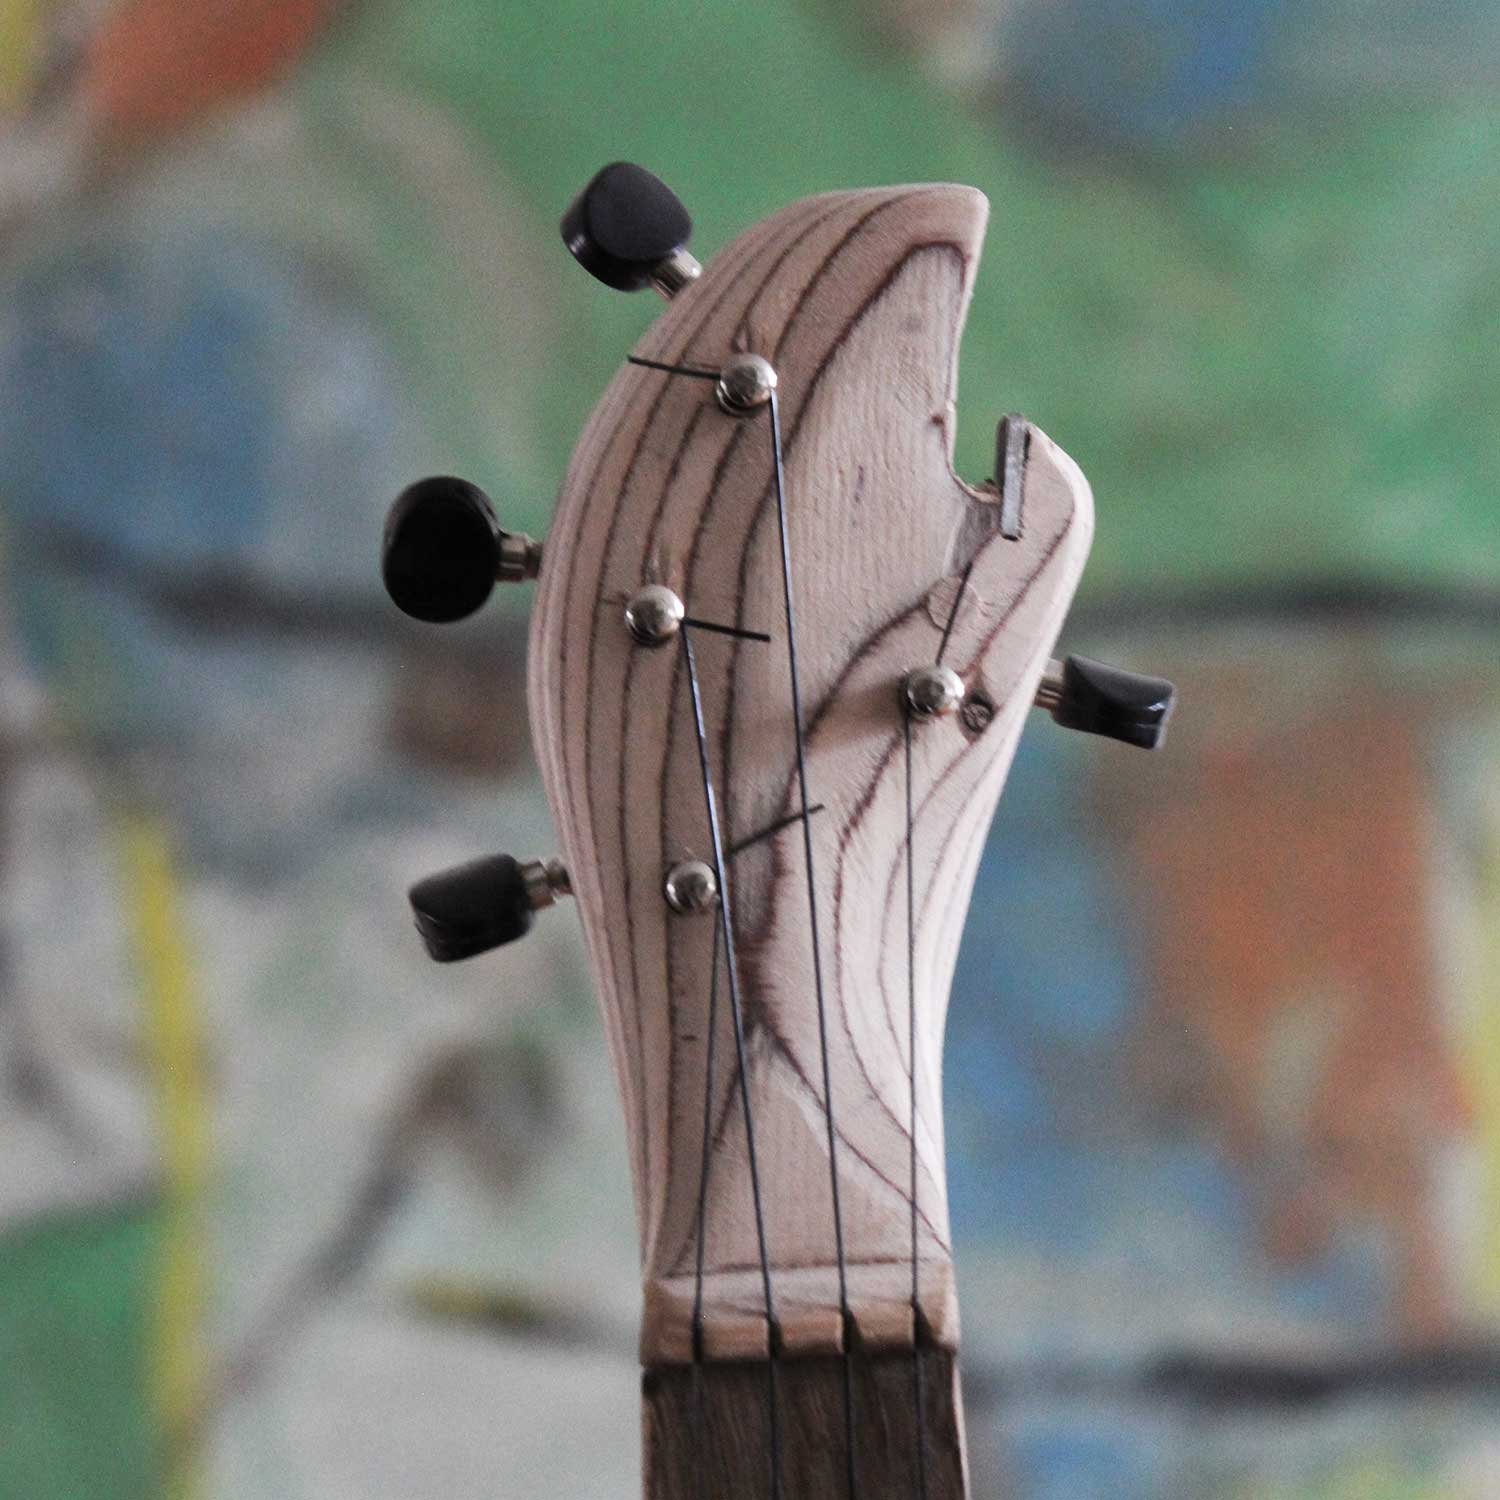
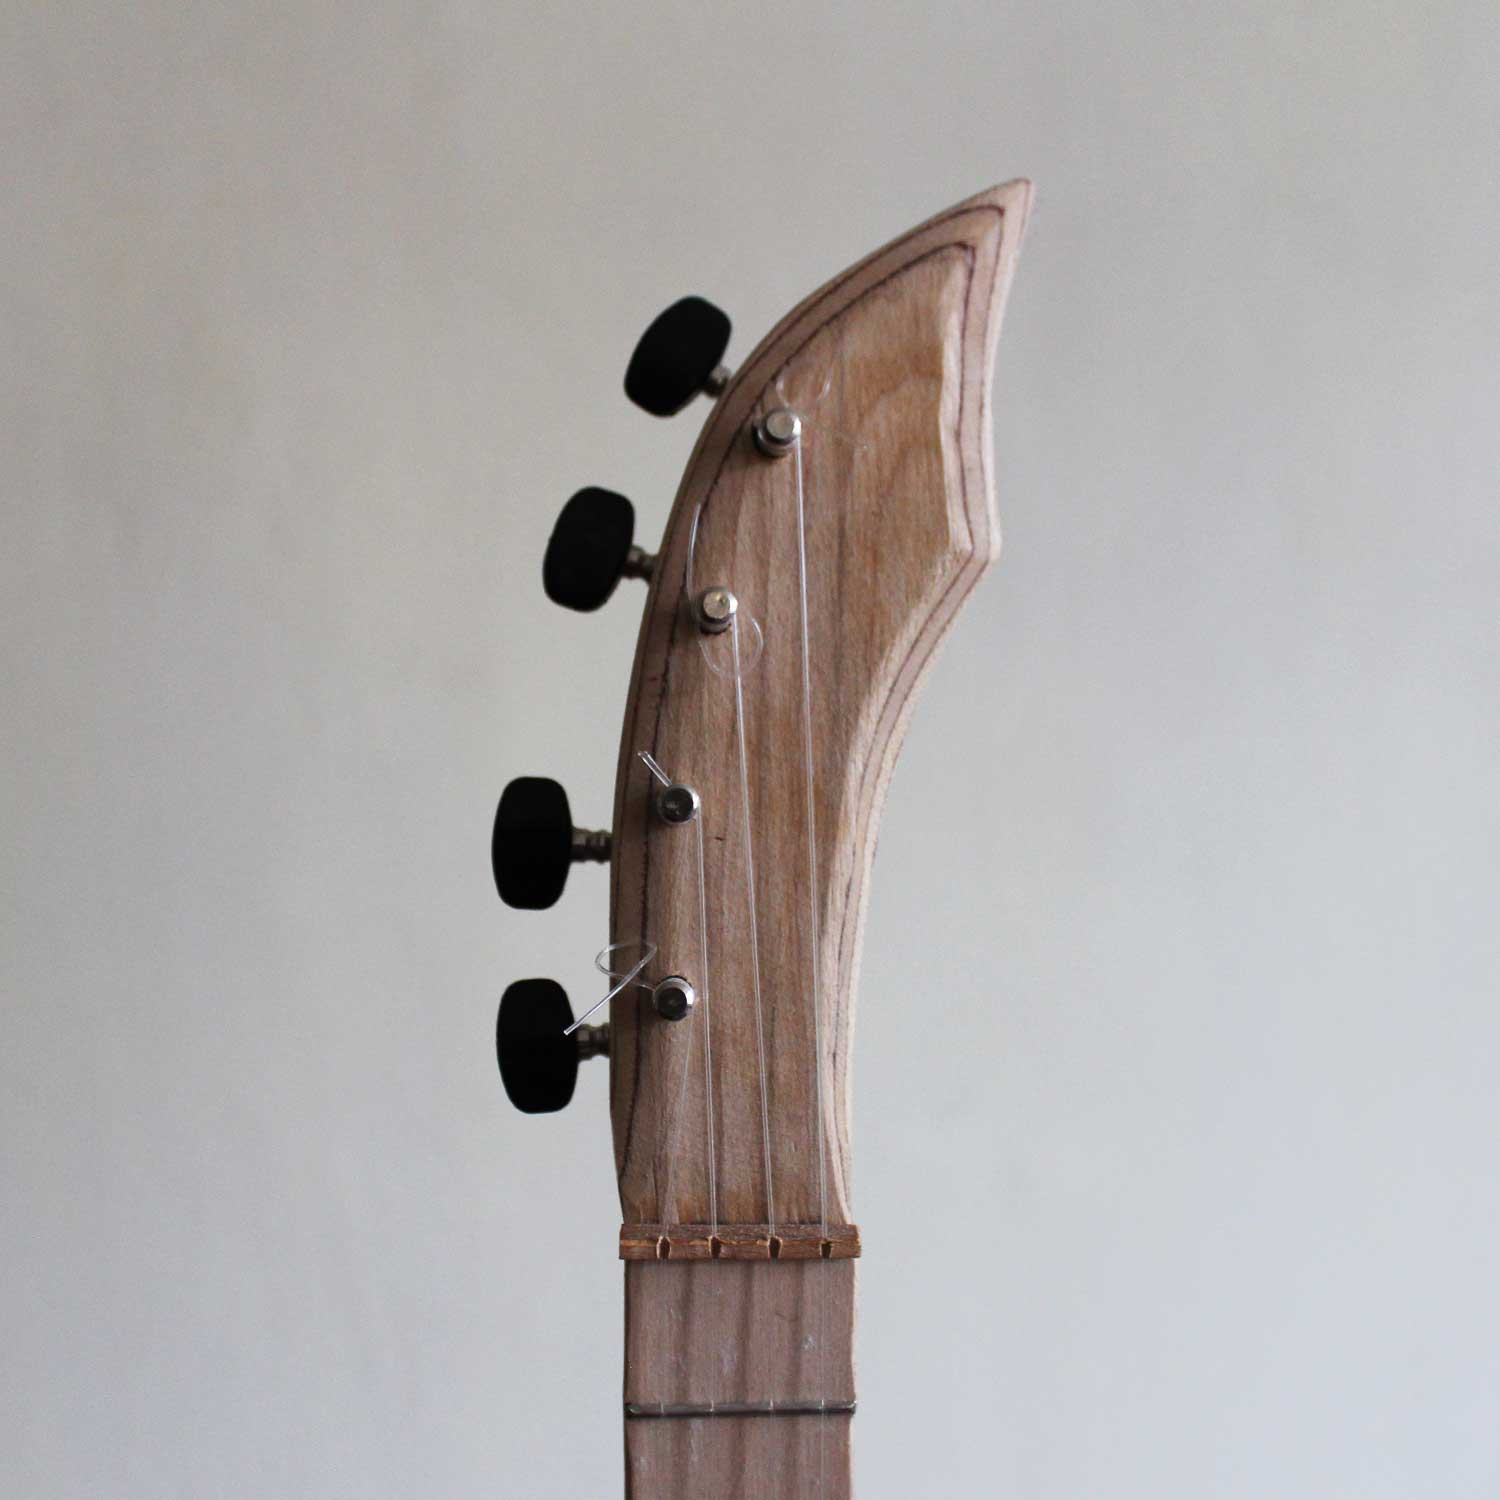
Wire mechanic head
Aesthetic, light, and simple head form for wire direct mechanics.
- Most intuitive head form for wire direct mechanics
- Pulls the strings on the nut, even if head and neck are straight in line.
- This head form is just working with wire mechanics.
The tuners
Tuners are responsible for adjusting the tension of the strings.
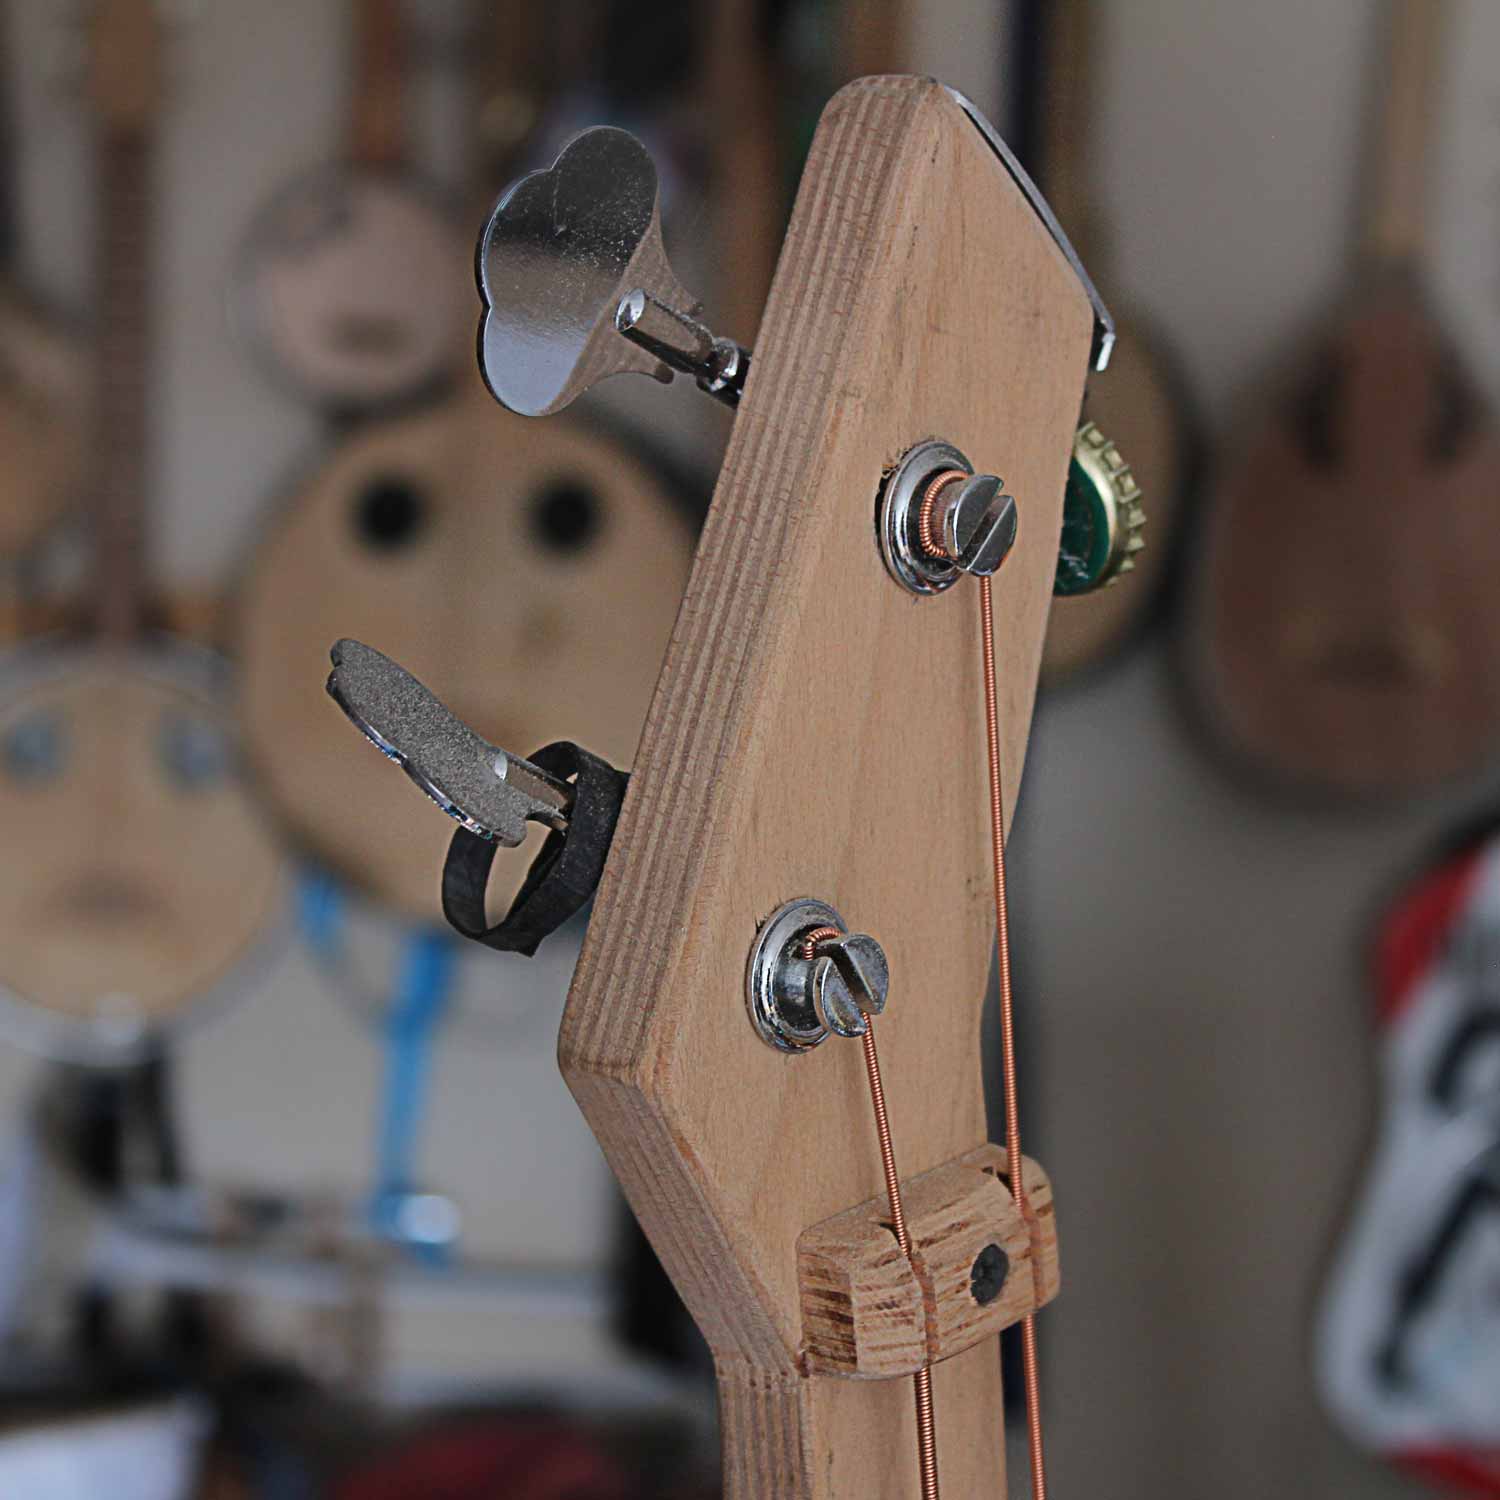
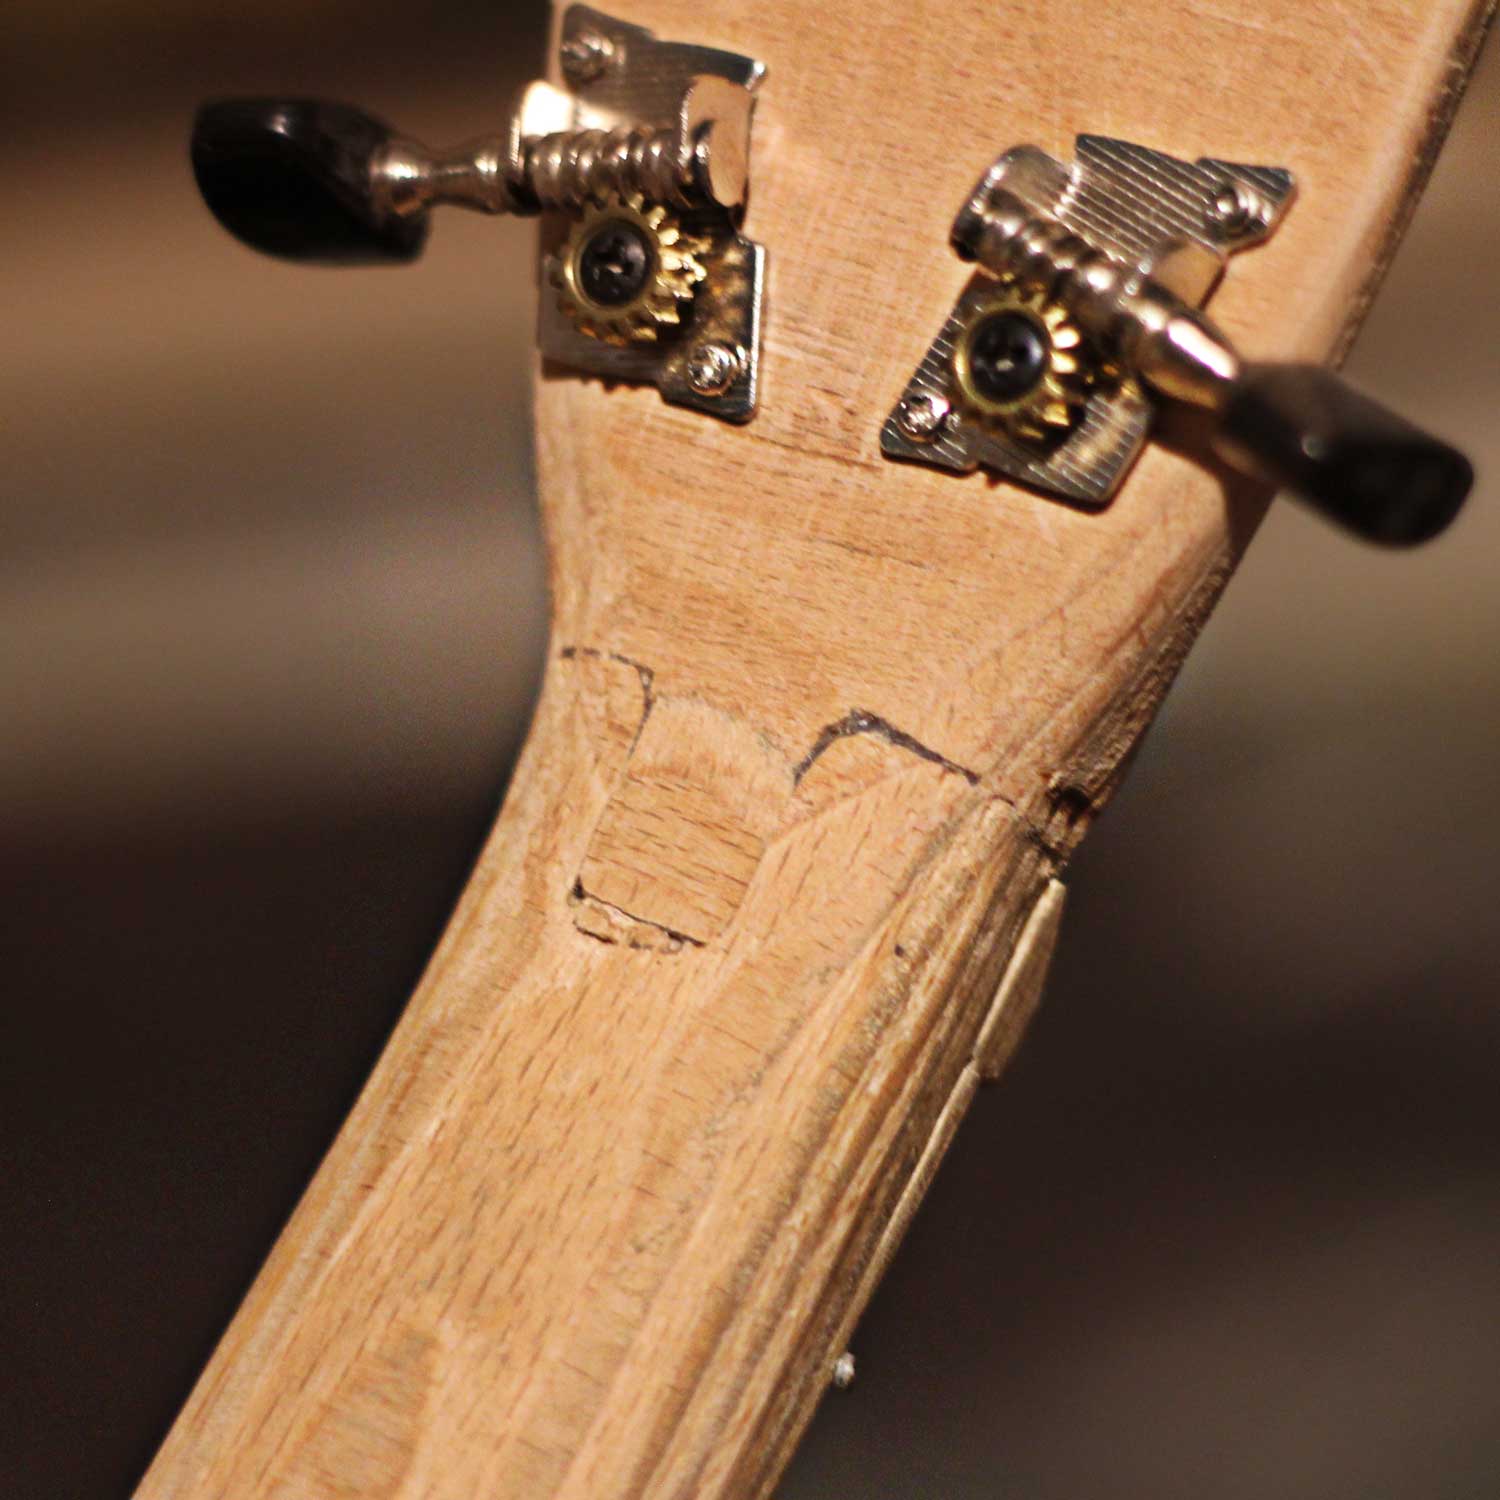
Bought tuners
When you want to do a more „professional“ guitar and your main focus is not to make everything yourself and 100% no-budget, than I actually would recommend buying them. It’s definitely more relaxed to tune your instrument with them. Still, they are maybe even not the most simple solution, when it comes to the installation, because you need to work a bit more precise when drilling the holes.
- Most accurate tuning, easy handling.
- If your instrument is out of tune, it will not be their fault 😉 (They keep the tuning)
- Recommended for metal strings, as they can handle hard tension best.
- You need to buy or plinder them from a broken guitar
Wooden direct mechanics
Good old classical. You can make them completely yourself out of hard wood. It is possible to make them just with a saw and some sanding, but to make them properly and well tunable, special tools (something like a huge pencil sharpener) are needed.
The tuner gets slightly thinner, at the end. Like this, it will not get loos, even if it gets turned lot in the hole.
- Can be done for free!
- Done pretty easily, but just with special tools
- If they are not well-made, it’s a pain in the ass to tune the instrument
- To precisely shape them, a special tool is needed
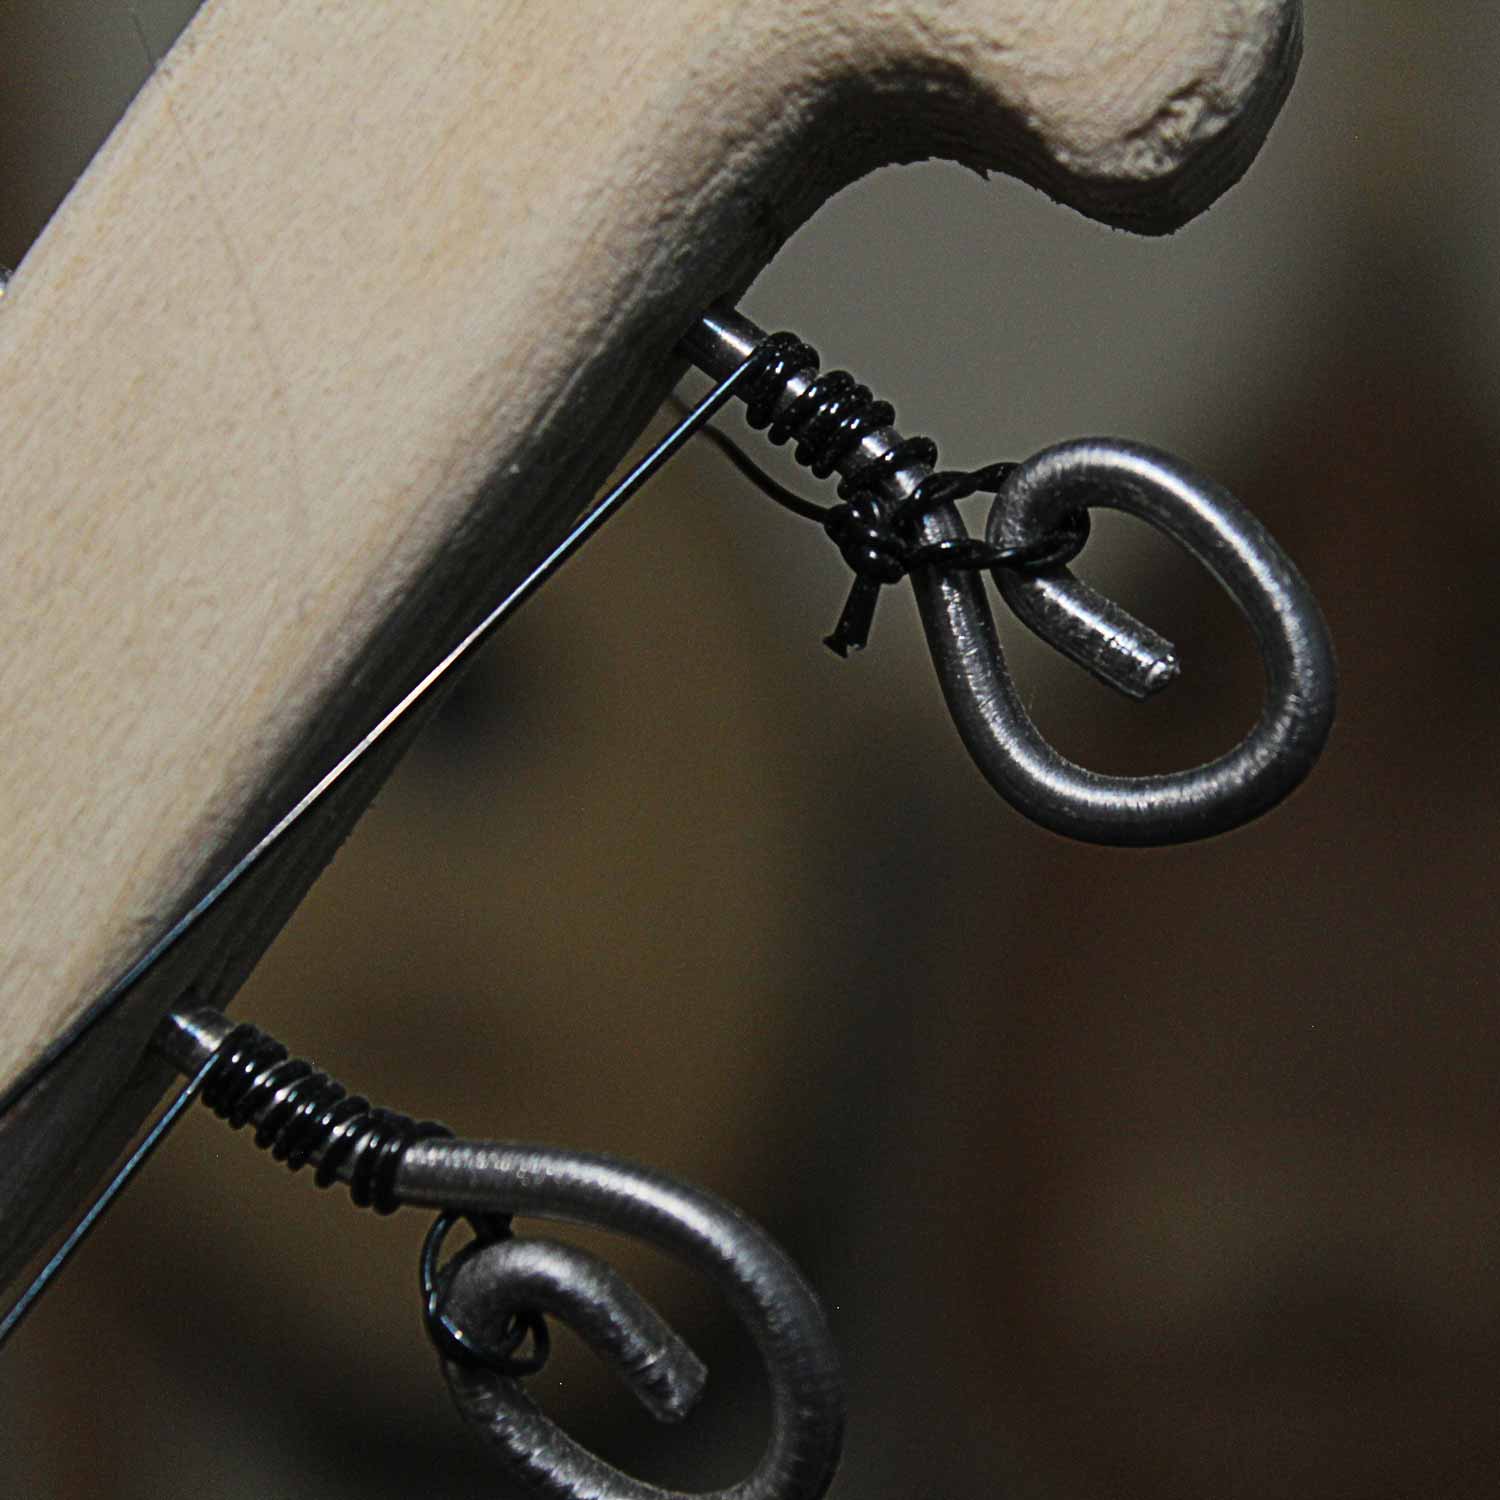
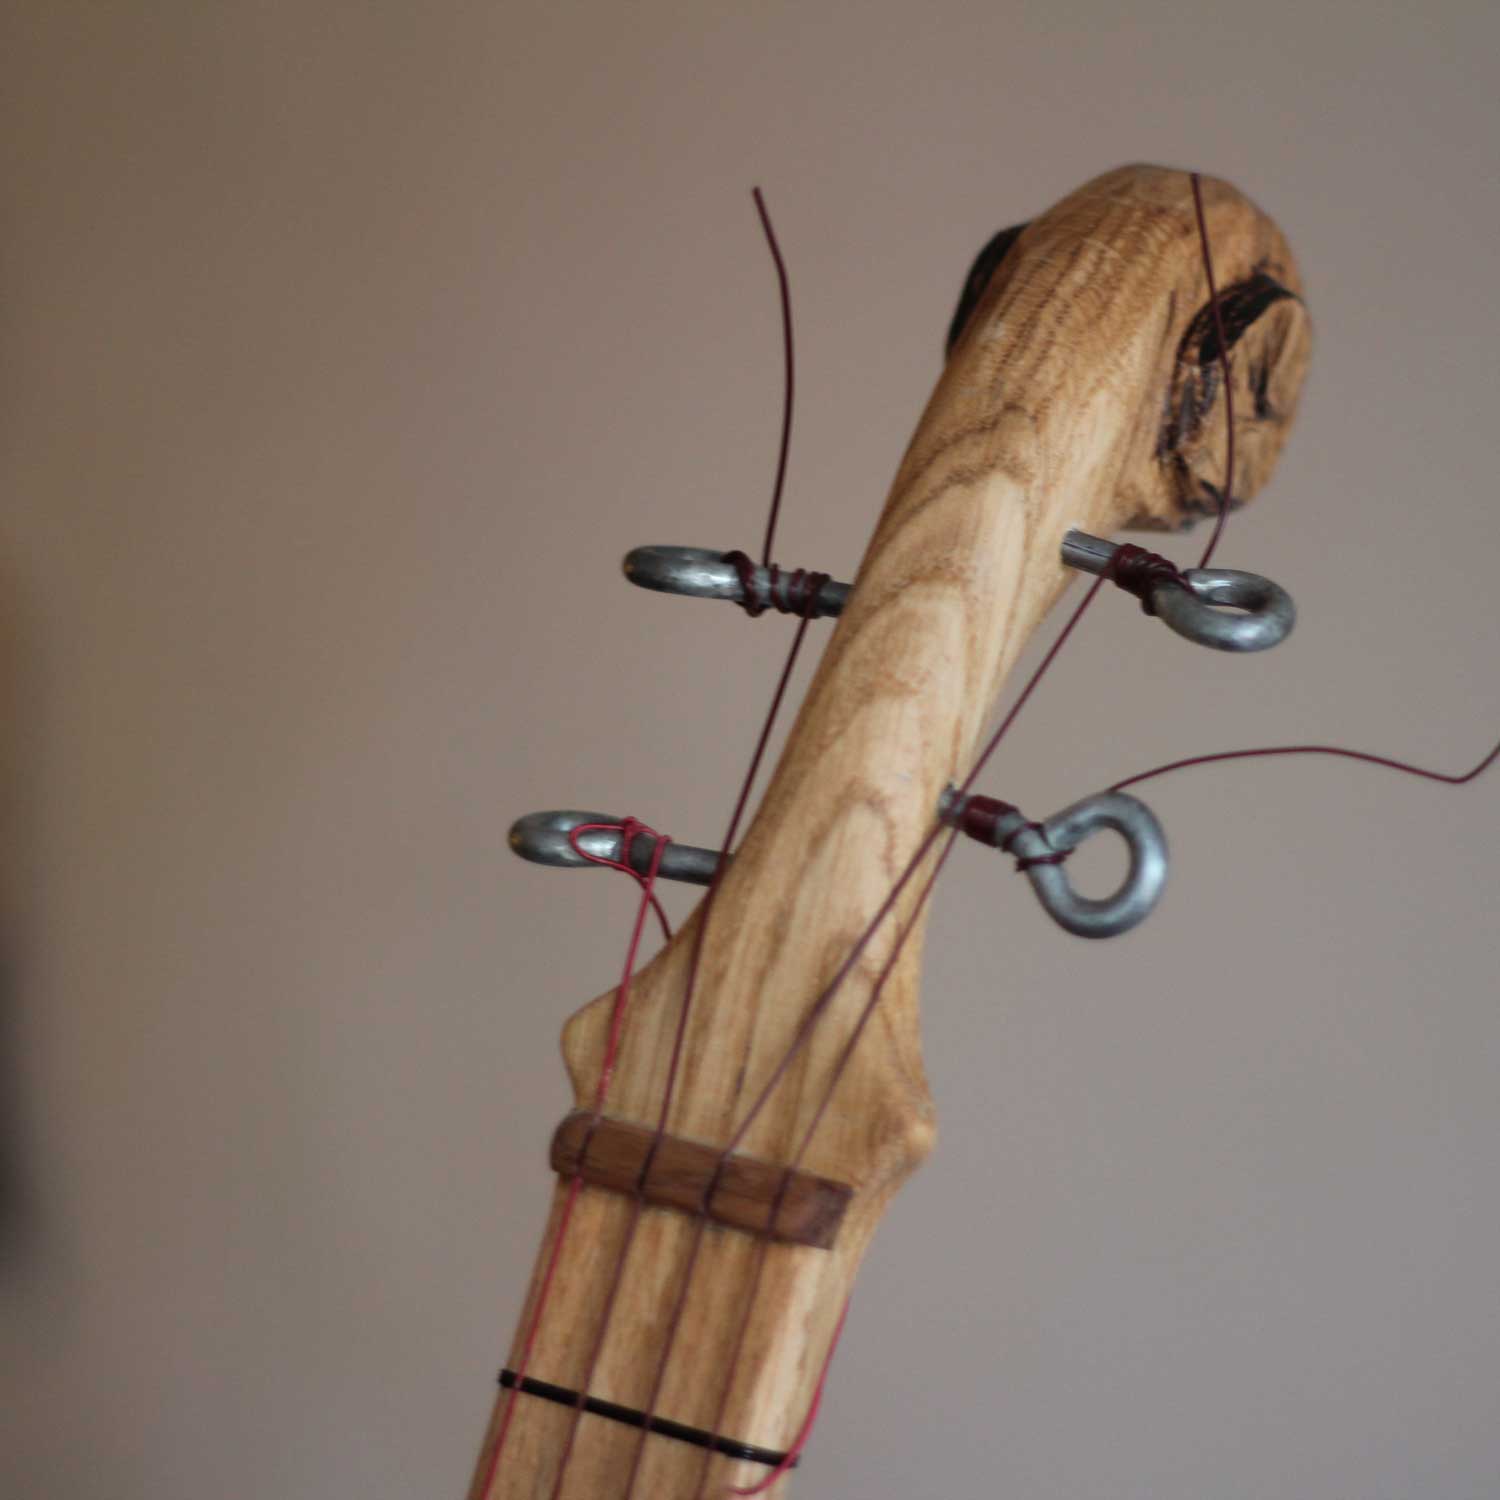
Metal direct mechanics
Fence wire, clothes horse… useful wire is always around. Two/ three millimeters is a nice diameter. Thicker is mostly hard to bend, thinner gets a bit weak or doesn’t hold well in the wood anymore.
- As they have a smaller diameter as wooden mechanics, they are less sensitive when it comes to tuning, so it’s easier to tune precisely
- Fast and easy to create and to attach! The workflow is excellent.
- Can lose the tuning, when the holes are not tight enough.
- Low comfort when attaching the strings, but no magic either
The nut
- The nut has the following functions:
- Keeping space between the strings and holding them in place
- The nut is the last contact point before the freely vibrating strings begin
- It is important, that the strings have a good pressure on the nut, to not slip out and not make any snaring sound. This can be a problem, especially when the head is not angled but is a straight extension of the neck. If you are having issues here, inverted nuts can be a solution.
- The height of the nut is very critical for the playing comfort! Make sure it’s just high enough to not touch the first fret on the fretboard while playing. A good distance from the strings to the first fret is lower than one millimetre.
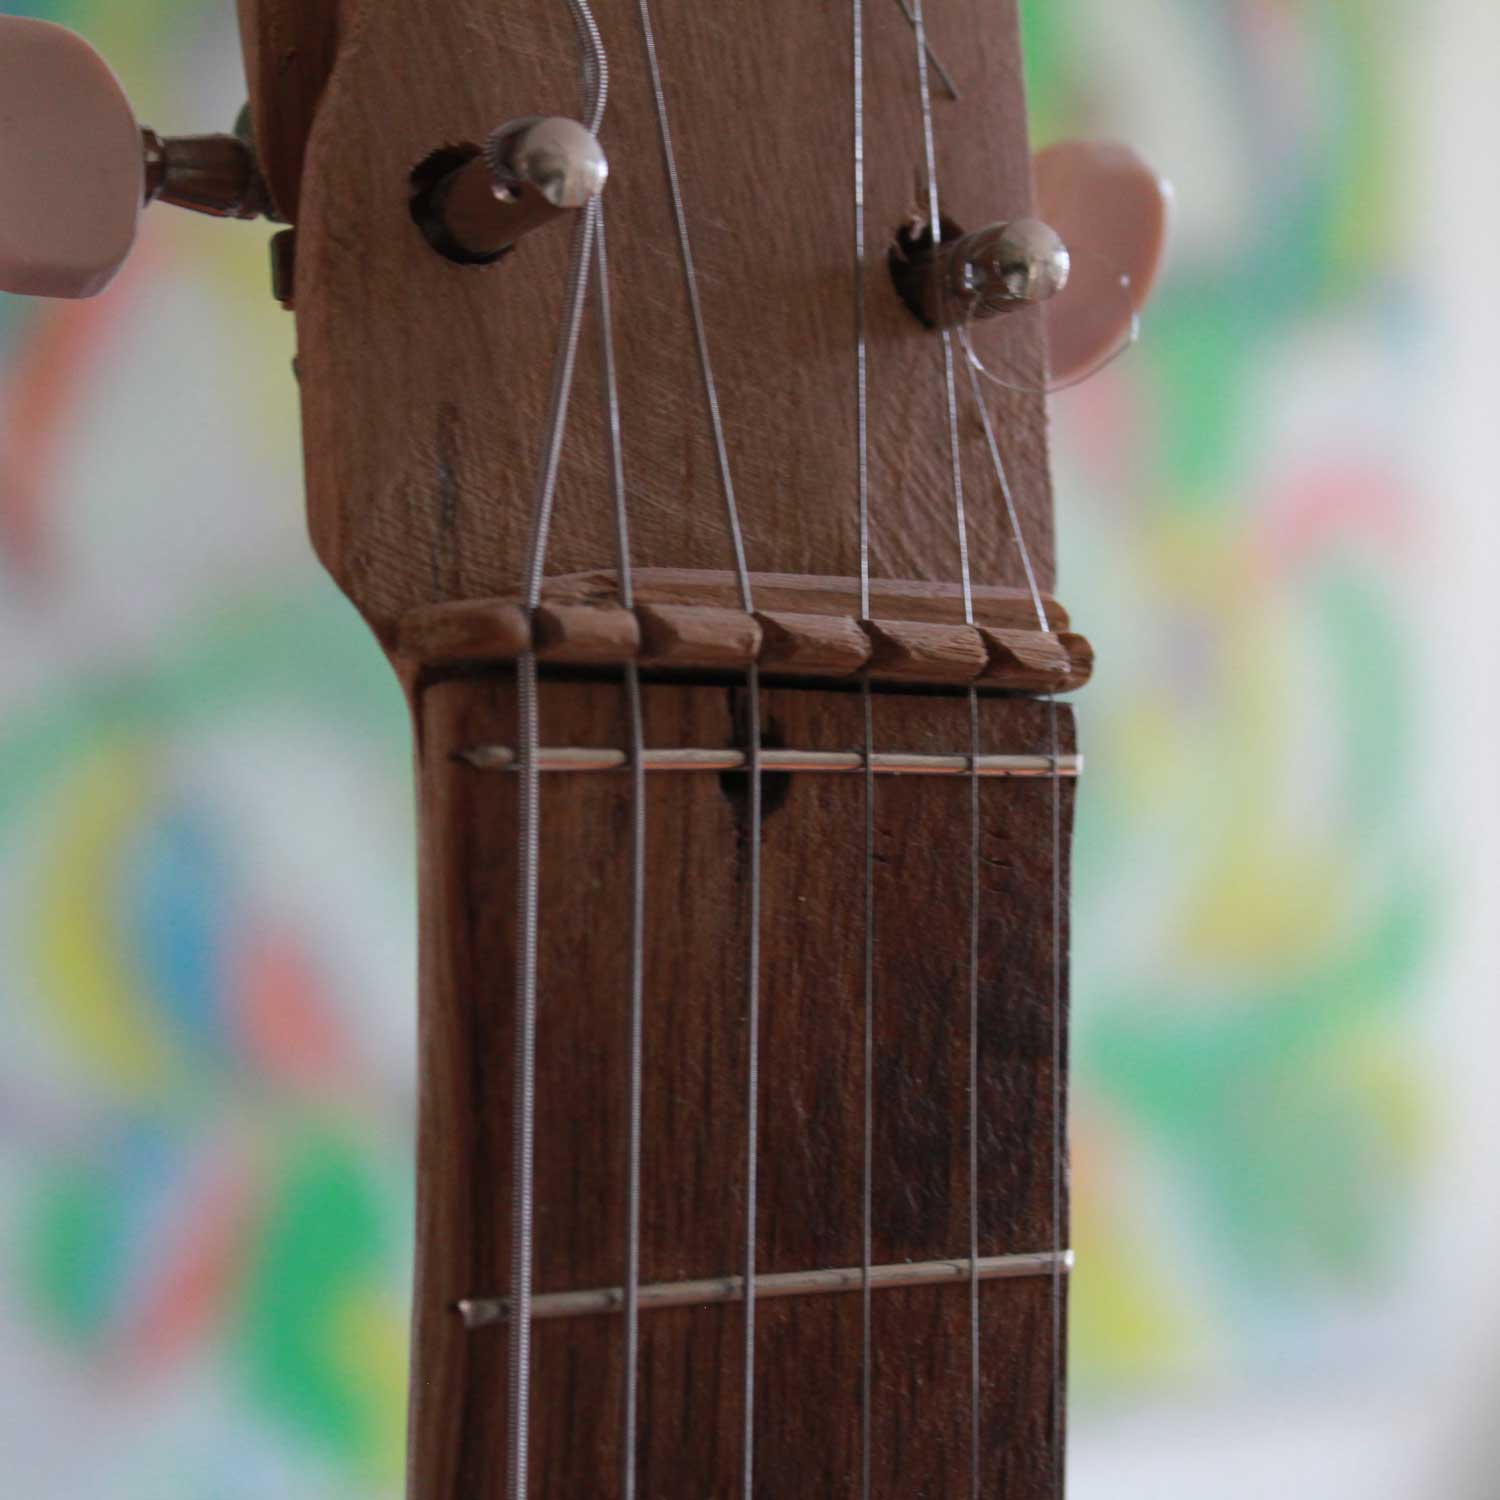
Classical nut
This is by far the most common concept. Hard wood, bones, aluminium or other metal – as long as the material is hard, it will do its job.
- Long-time proofed concept
- Accurate working required
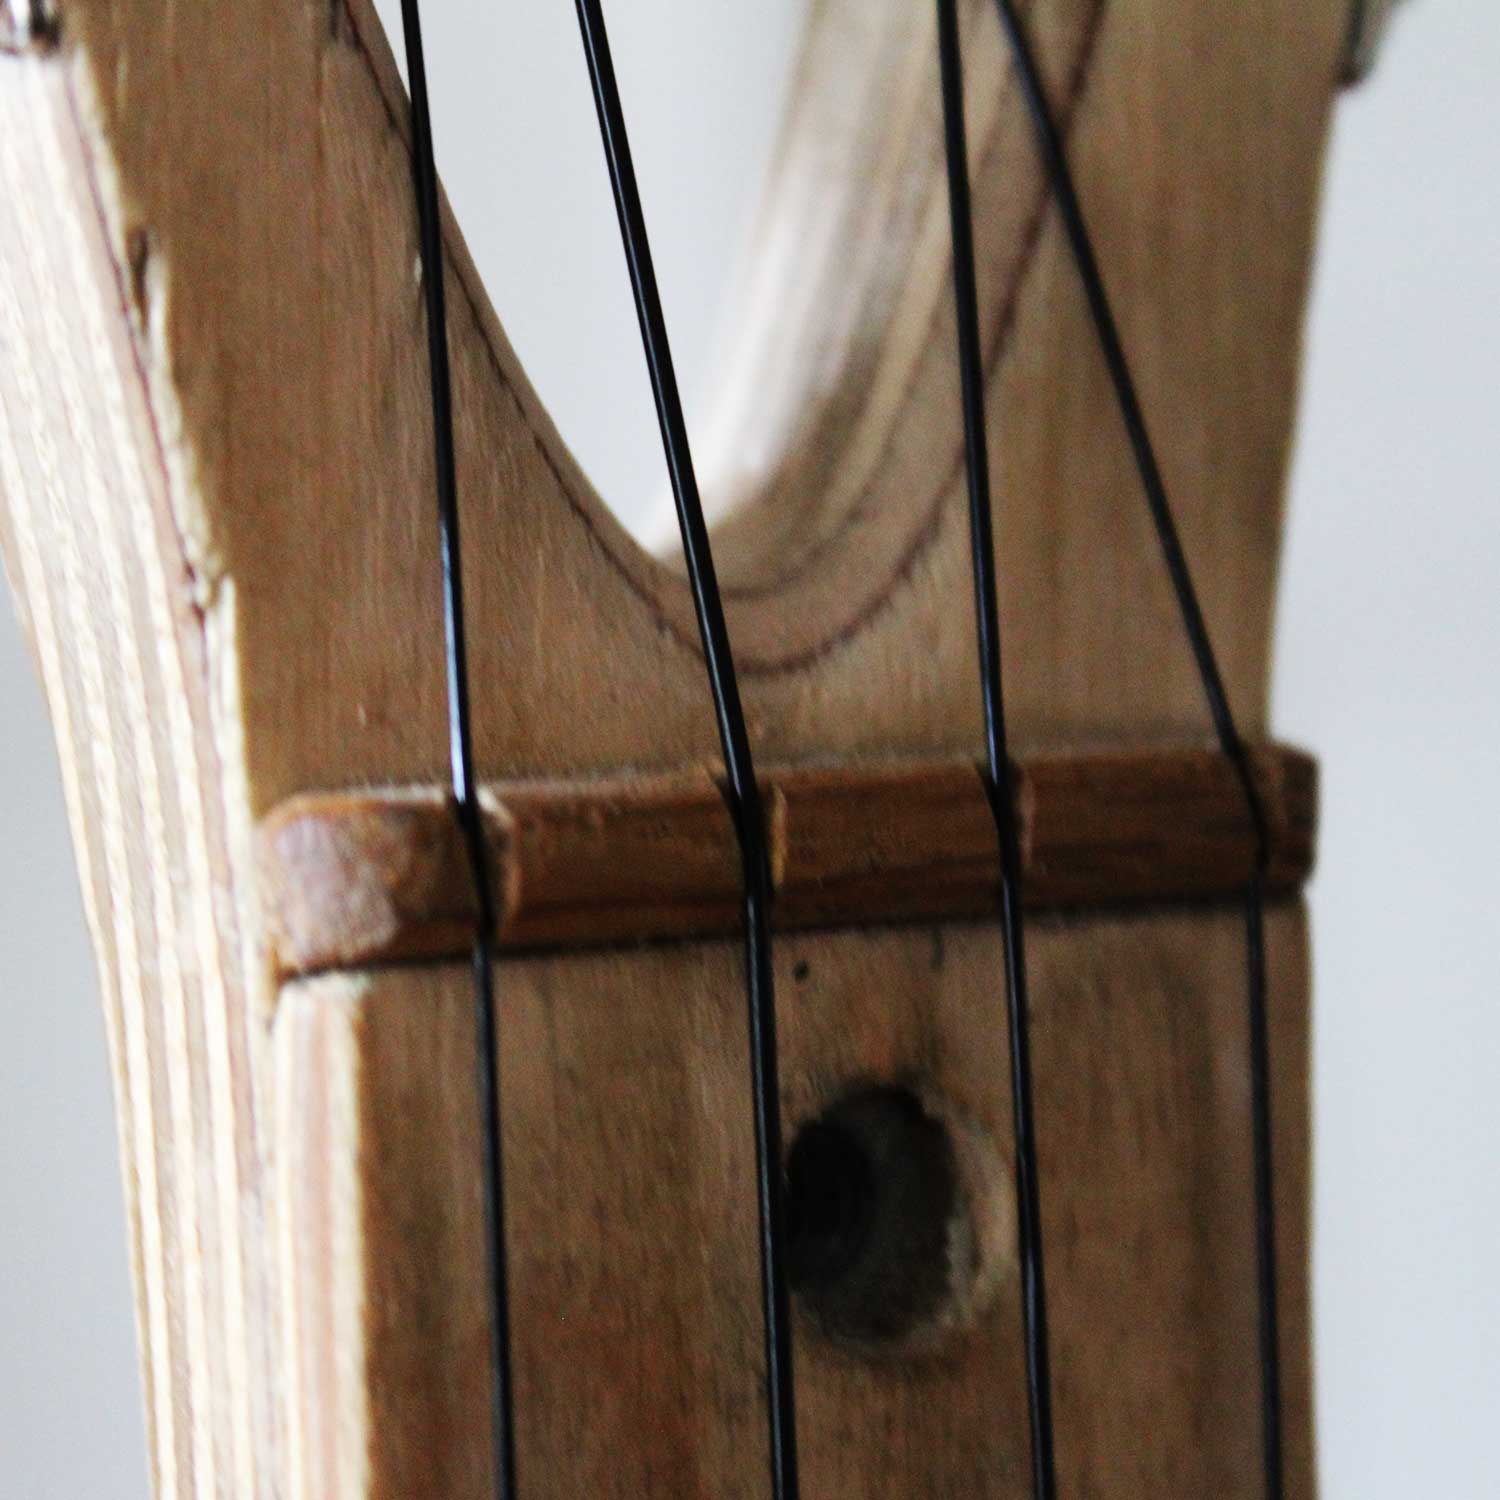
Nut with 0 fret
The advantage of using a 0 fret, is that you don’t need to worry about the depth, when you saw the gaps for the strings. That’s because the (free swinging) strings will basically start from the 0 fret and not from the nut any more.
- Easier to build, because the 0 fret takes the responsibility for the right distance between fretboard & strings
- Maybe less sexy
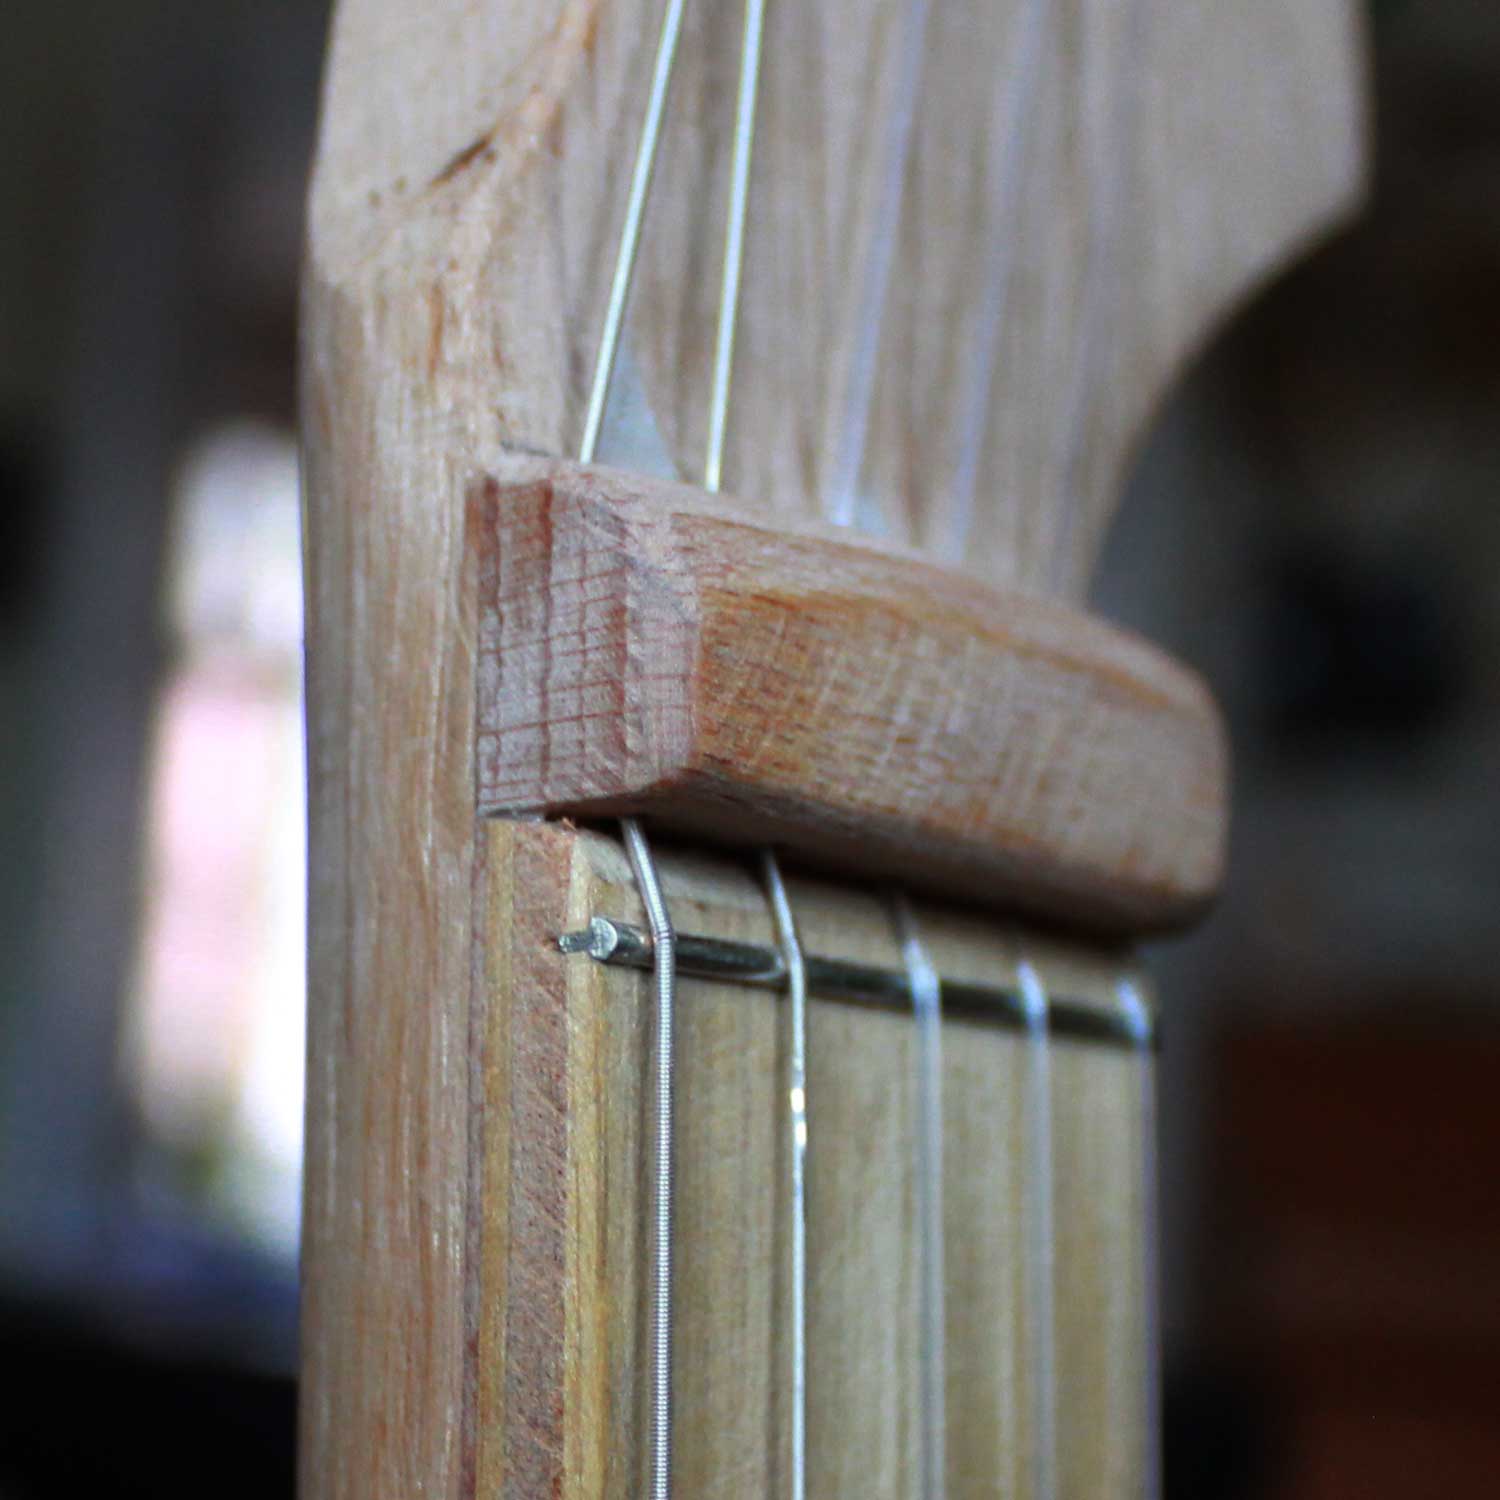
Inverted nut
Imagine making a nut, but then glue it upside down… Sounds weird, but the reason is simple: when you make neck and head straight, there might be the problem, that the strings will not be pulled down enough to the nut. So the nut takes this responsibility itself and pulls the strings down to the 0 fret.
- Holds strings down, even if the head is not bent
- Strings can not escape (useful for foldable travel guitars)
- Playing comfort can be reduced, because the nut is a bit bigger
- It can be a little more fiddly to put on new strings, as they need to pass this nut.
Neck & fretboard
The neck
„Standard“ neck
The classical neck, glued in the first few centimetres of the body top.
- Works well with wooden bodies or other stable body forms
- Not compatible with many weaker bodies, because the tension of the strings is pulling directly over the body.
Going through neck
This neck doesn’t stop in the body, but goes through it until you can attach it on the bottom of the body.
- The only method for unstable and weak bodies (like paper mache or thin metal cans), because the tension of the strings stays on the neck and doesn’t affect the body at all.
- If you want a centred sound hole, the neck is going to be visible.
The fretboard
The fretboard is a ~5mm – 10mm thick wooden plate, which is glued to the neck. To calculate the position of the frets on the fretboard you can use this fretcalculator:
Fretboard or no fretboard?
- Just in case you fucked it up, to set the fret wire precisely, you don’t have to throw the whole Instrument. Just do a new fretboard.
- Depending on your construction, it might be good to add some extra height to your neck, so the strings have also a bit more space to the top of the body itself
- Can look sexy, if you have different wood colours
- If you wanna play 24/7, you can consider choosing a harder wood as fret board, which is a bit more durable… but this should be a minor consideration for most cases ;p
- More work and more material…
The frets
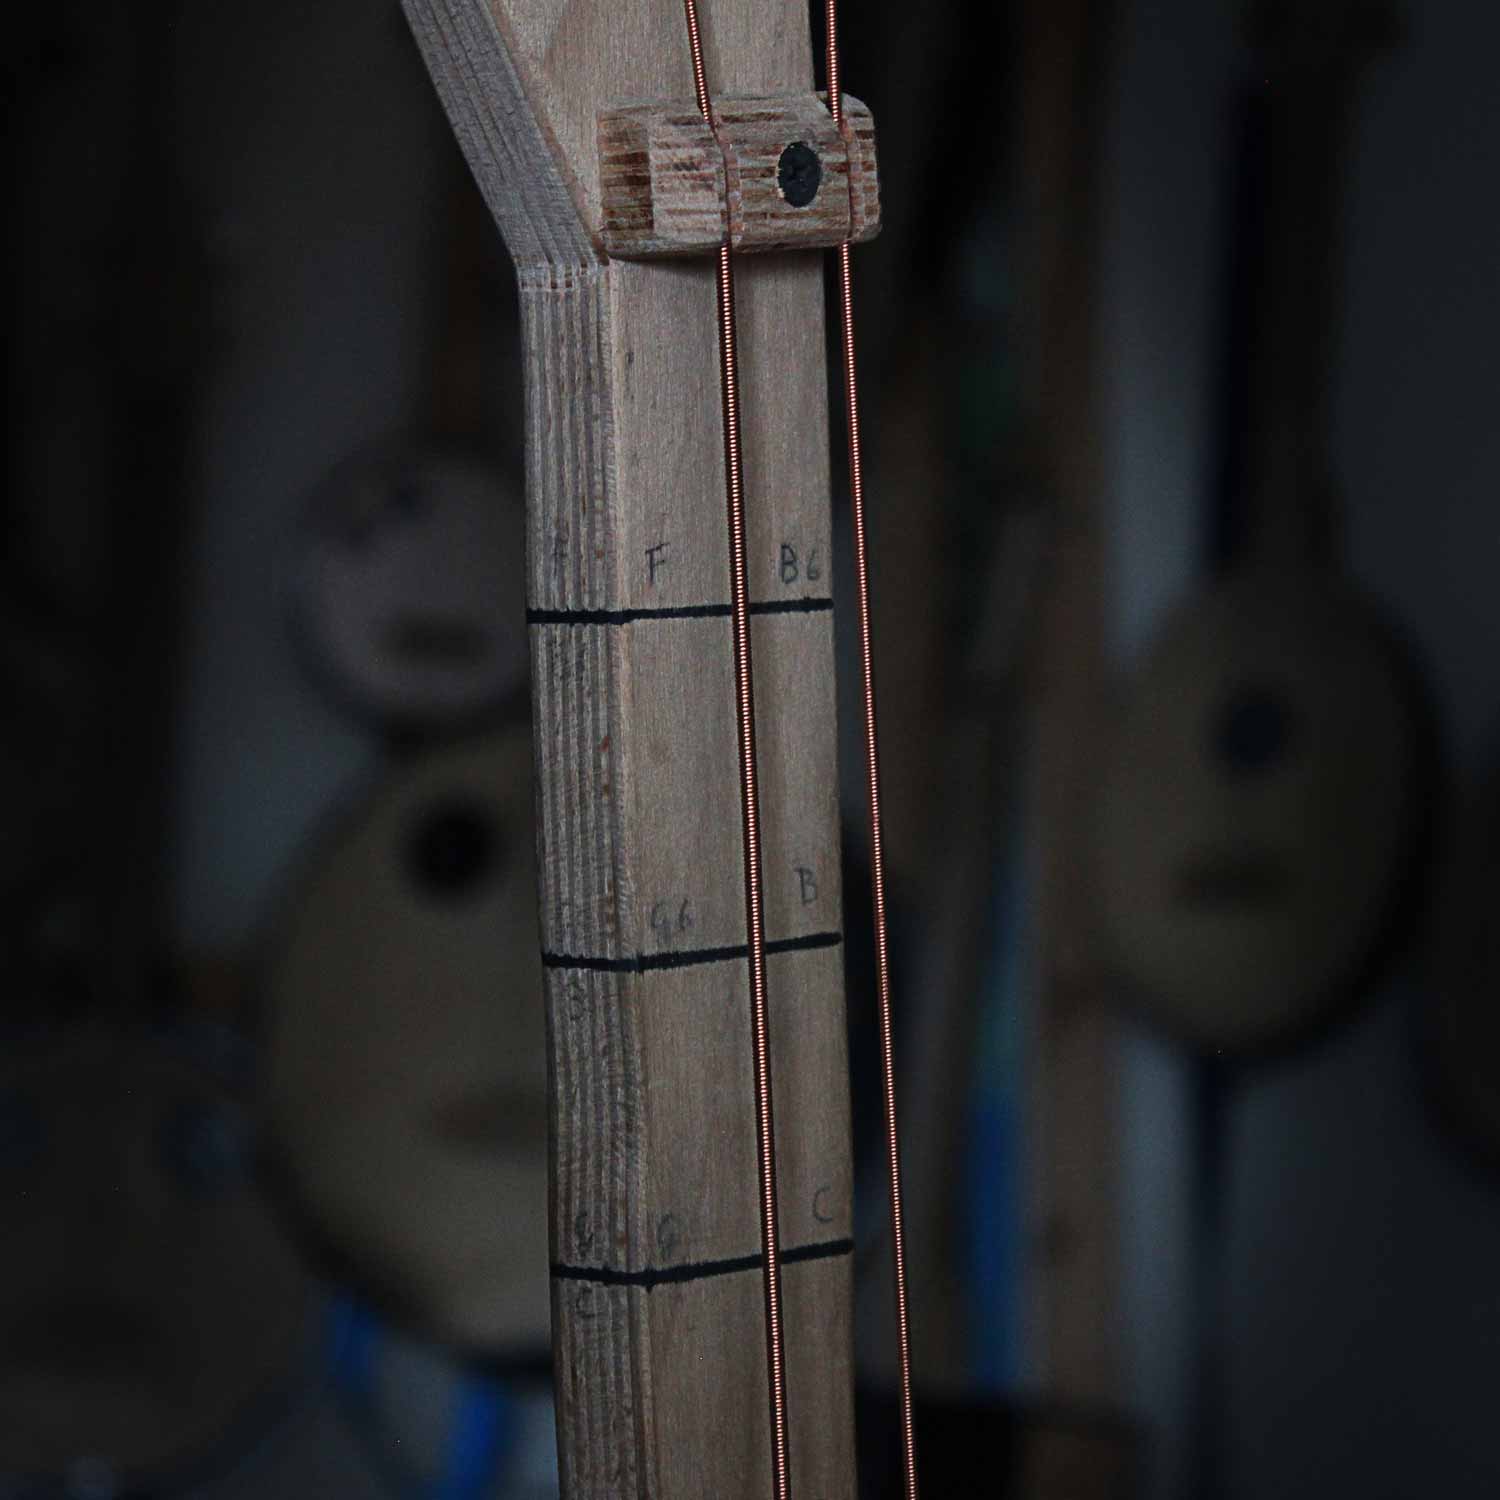
Fretless
In this case, there are no frets at all. You either need to press the strings precisely on the right position, like it’s done on for example a violin, or you use a bottleneck and an open tuning to have an American styled slide guitar.
- By far the easiest option to build
- Harder to play, as there are obviously no frets to help you

Frets with fret wire
This is the standard for all guitars & ukuleles. Fret wire has a T-shape so, you just need to saw a thin line on the fret board and press the fret wire in. That’s it. Even glue is optional.
- As they are mechanically stuck to the fret, they are holding very well
- High playing comfort
- No nice way to correct them, once they are attached. So you need to work precisely from the beginning on!
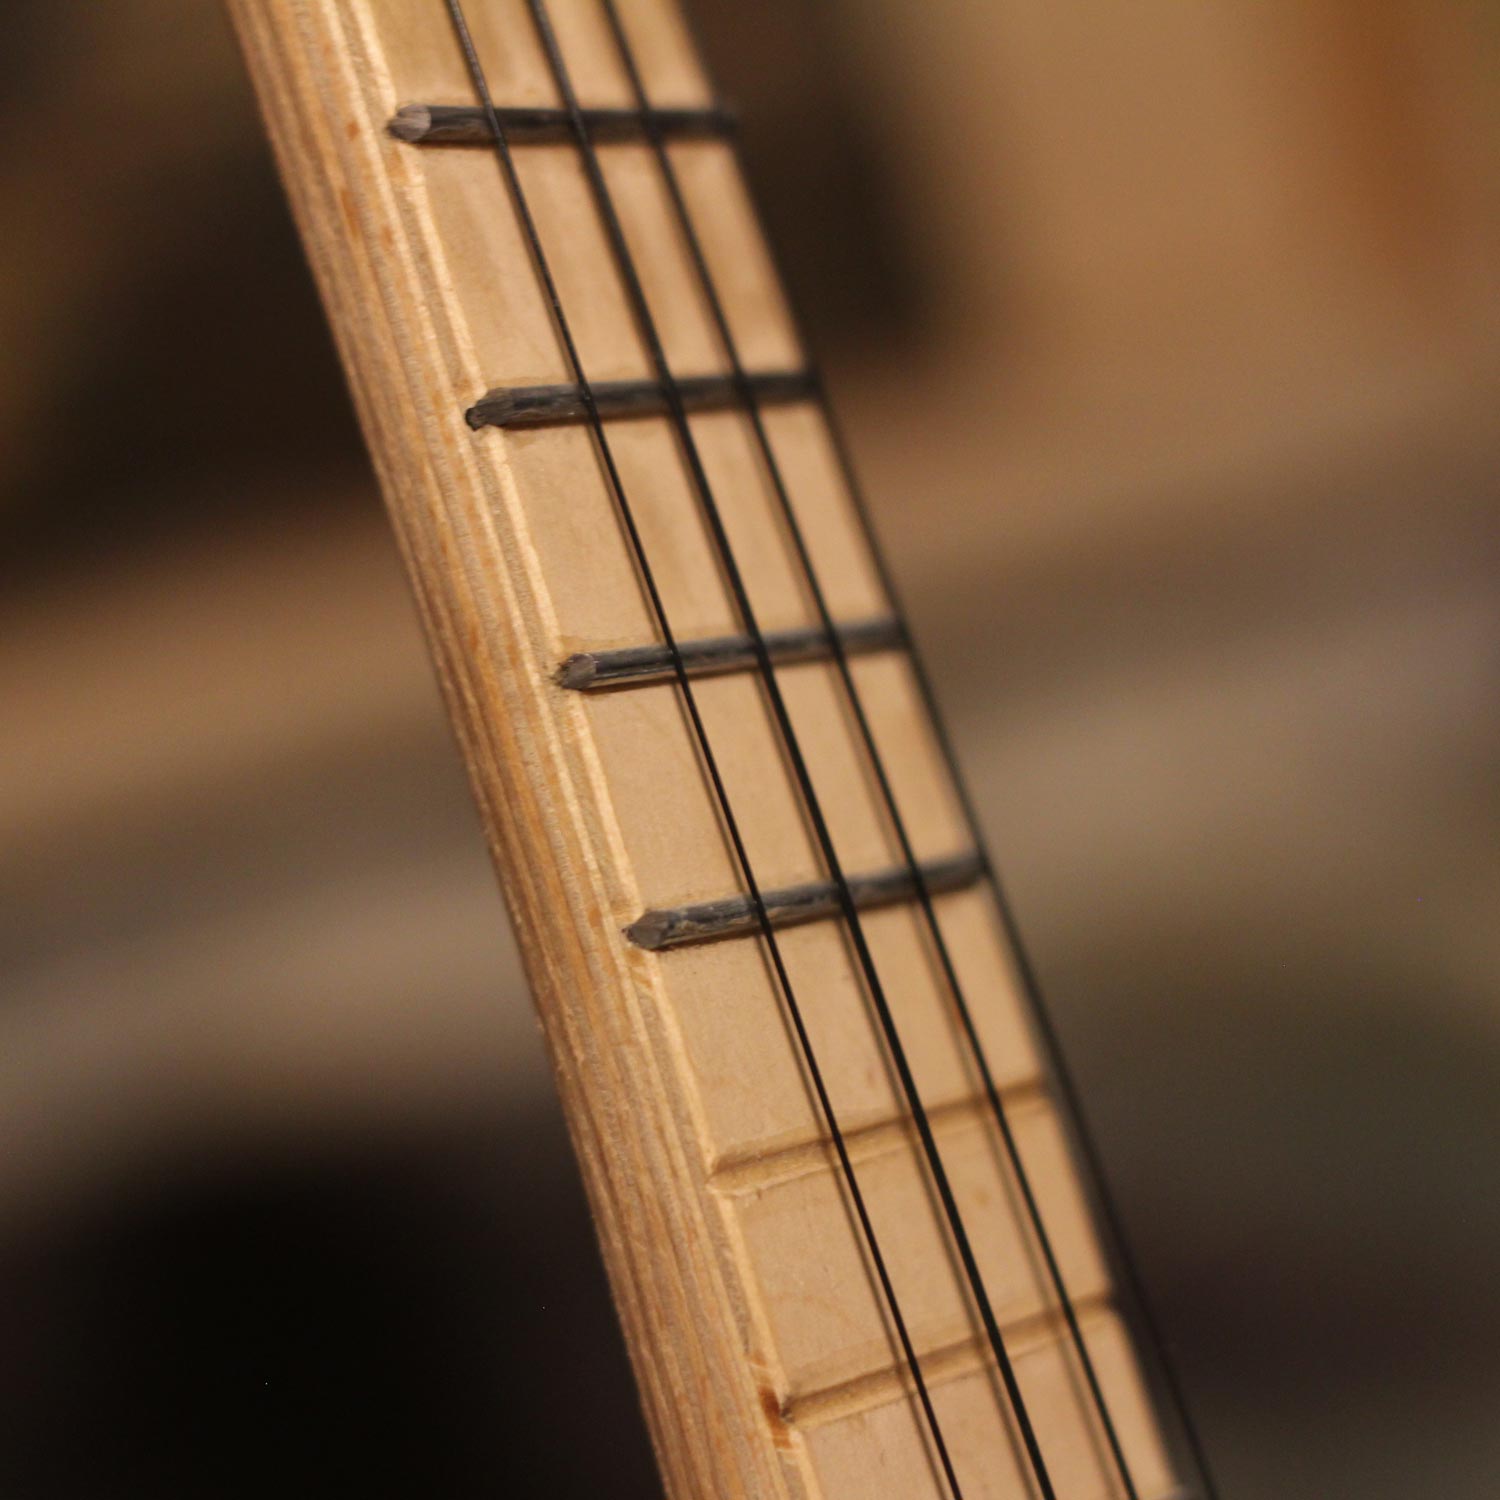
As professional fret wire is not the cheapest of all options, the thought is coming up, why not using nails or wire.
Well, it’s possible, but…
- Free – or at least very cheap
- Hard to attach. Even with good glue, the risk that they disappear in time is quite high.
- Harder to reach a good level of precision, as they are not attachable that easily
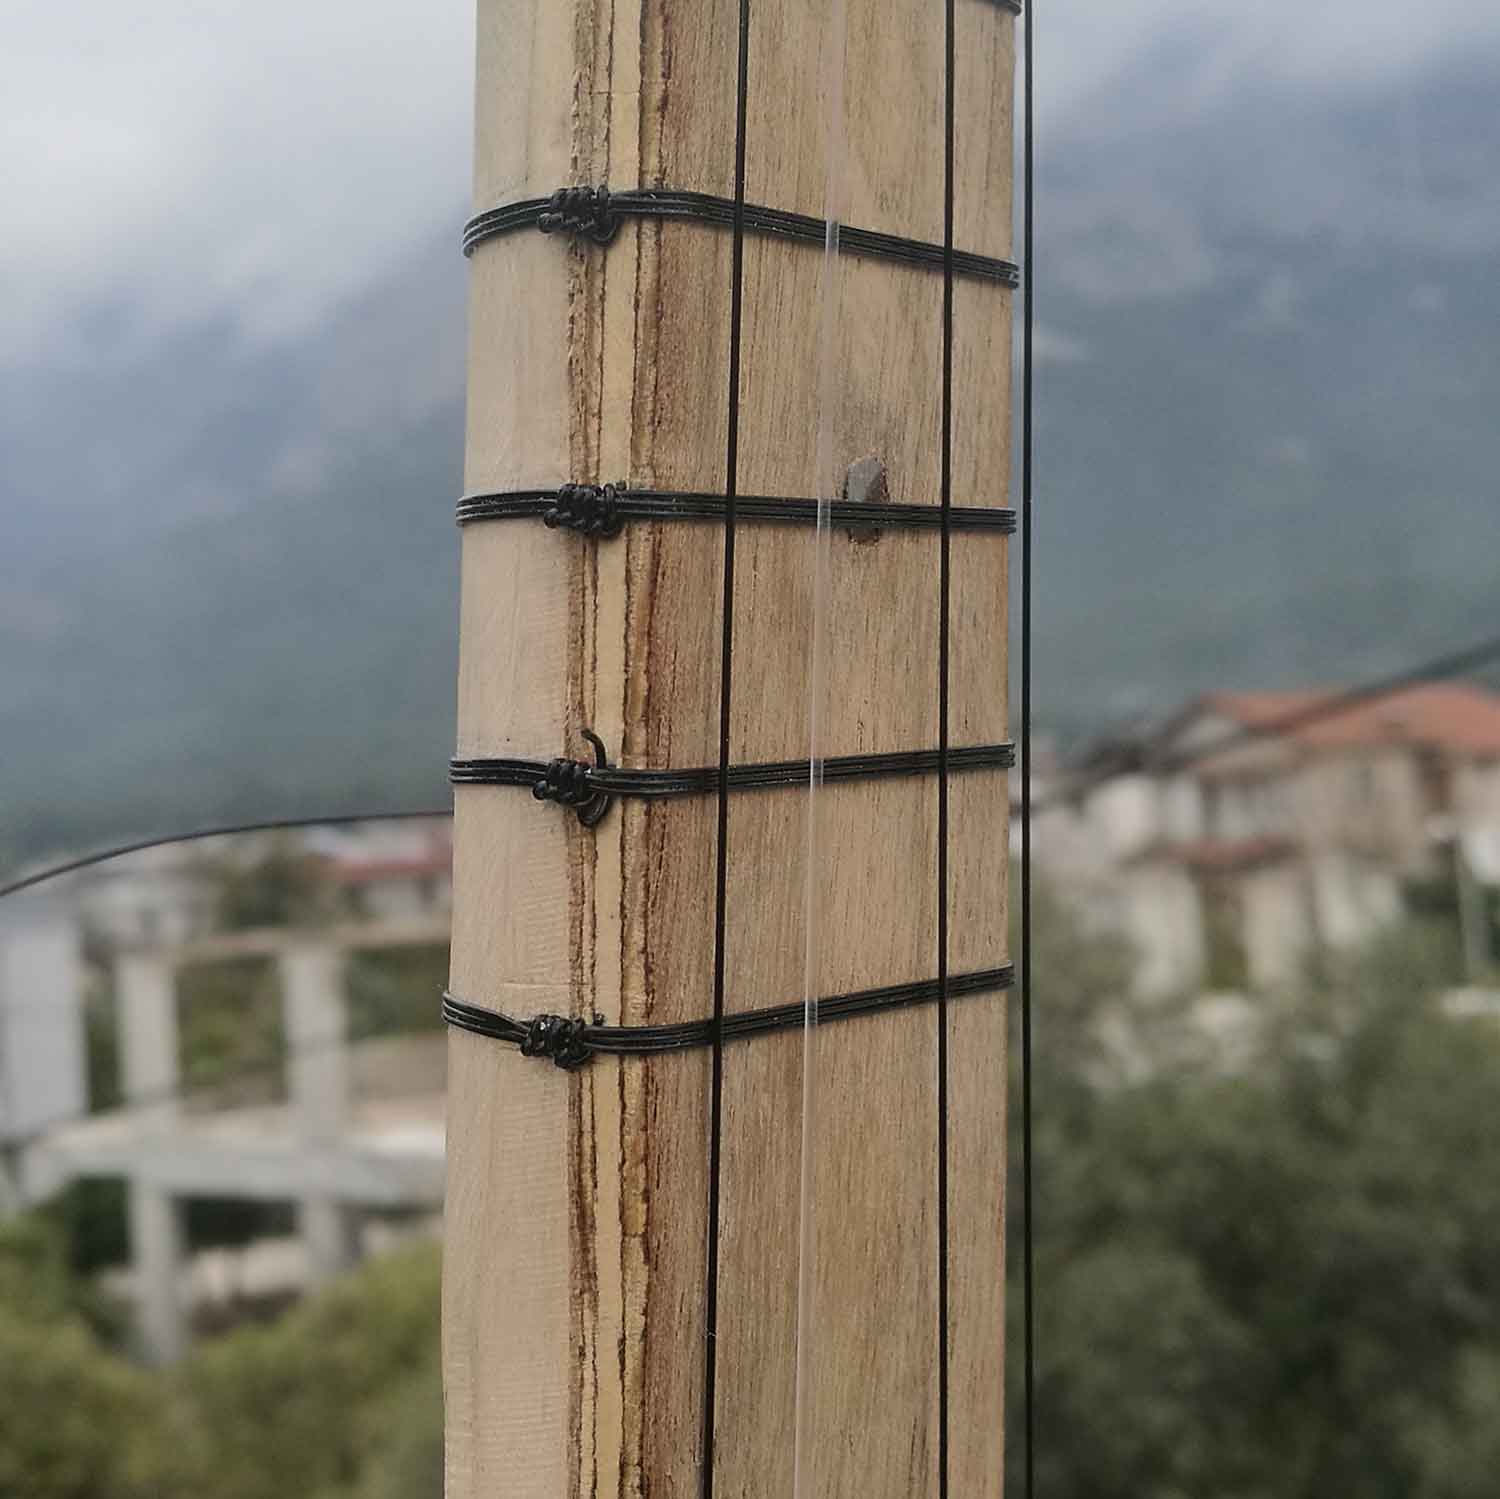
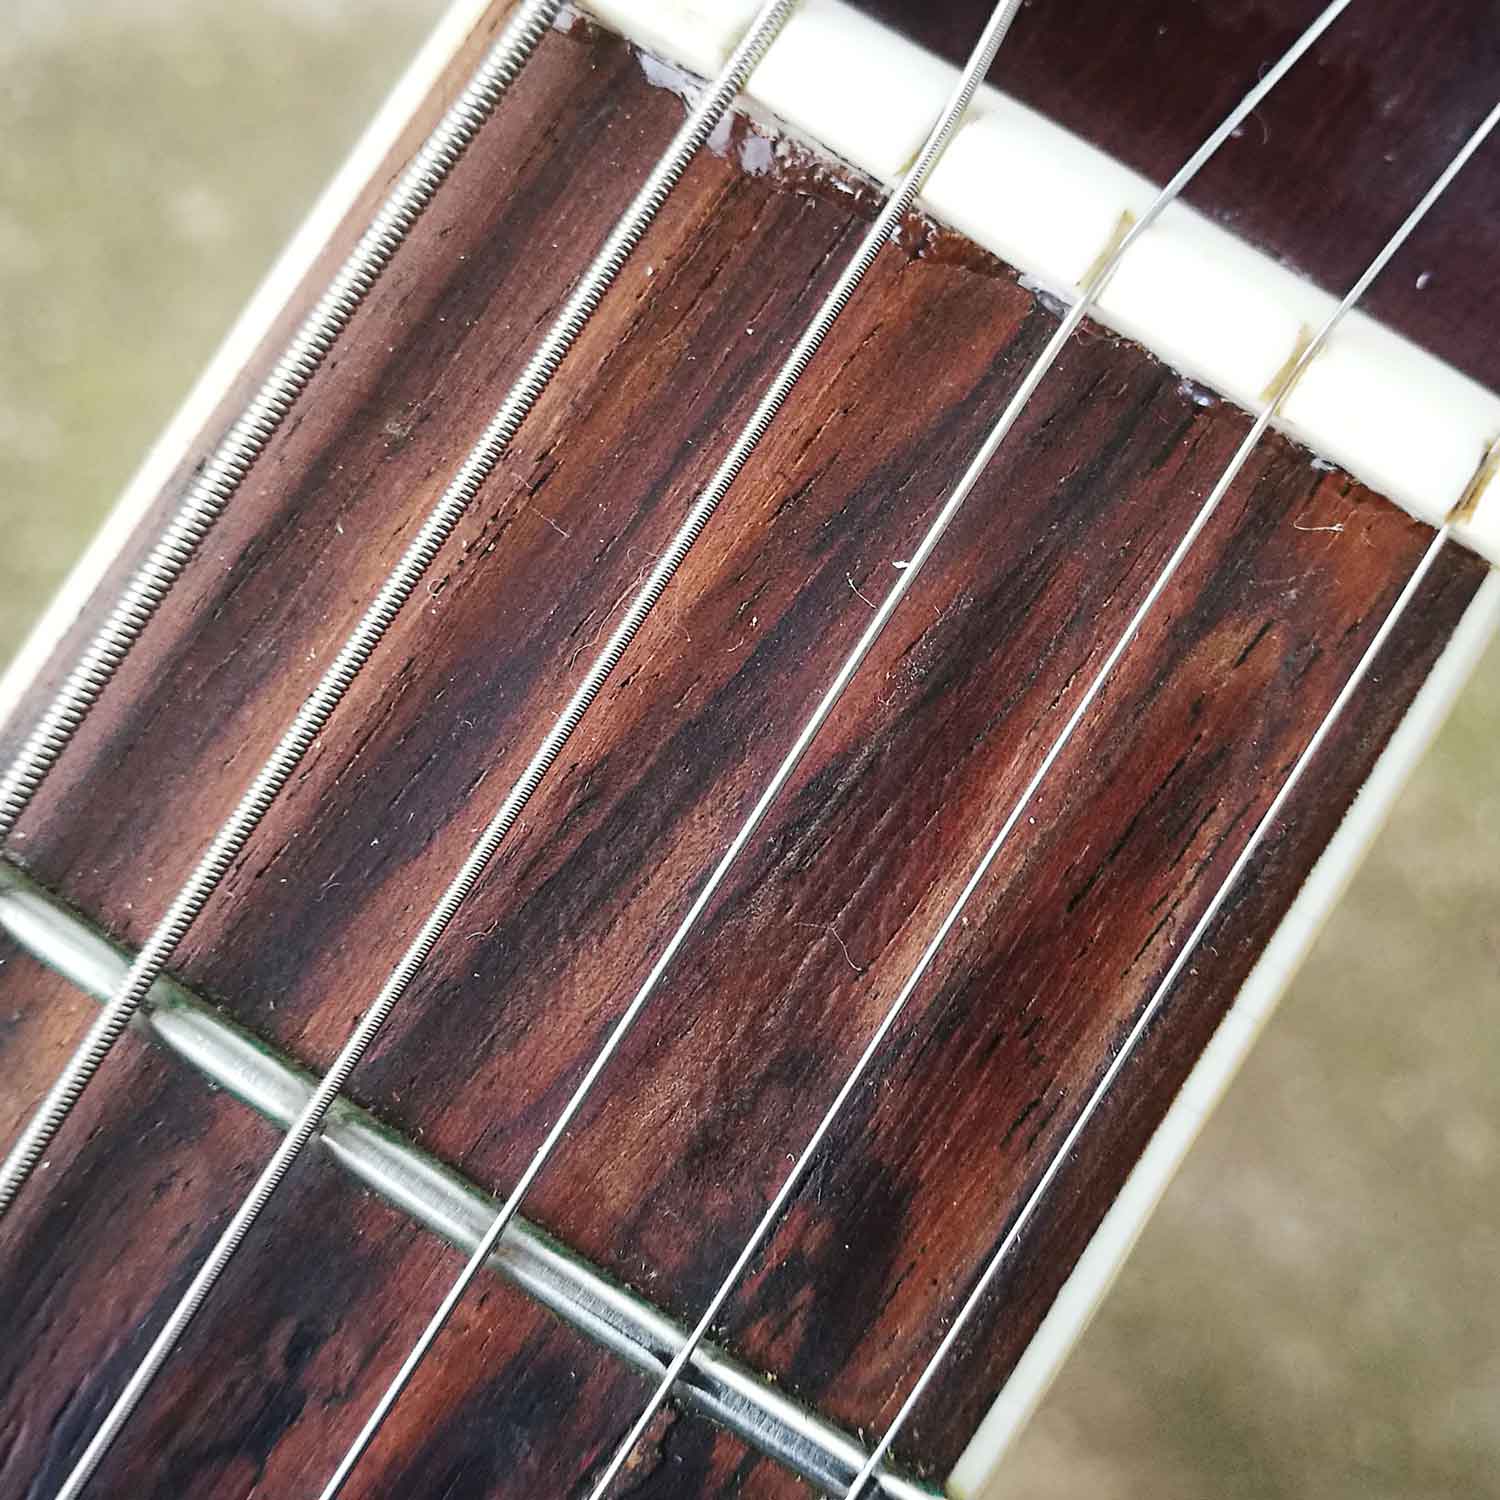
Frets with string
This style is widely used in Turkish/ Arabic/ … instruments. But it’s generally a good concept also for guitars & ukes.
Fishing line or nylon string or similar plastic strings are working well. Important is, that the material is as hard as possible. So don’t take wool. 😉
0,4mm – 0,5mm is a good thickness
- Adjustable! No stress, if the fret doesn’t sit on the right position. You can still move or replace it!
- The move ability makes the fretboard optional as well!
- Cheap and easy to do, but still professional
- Lower playing comfort, as your hand always comes along the fret strings while sliding on the fretboard
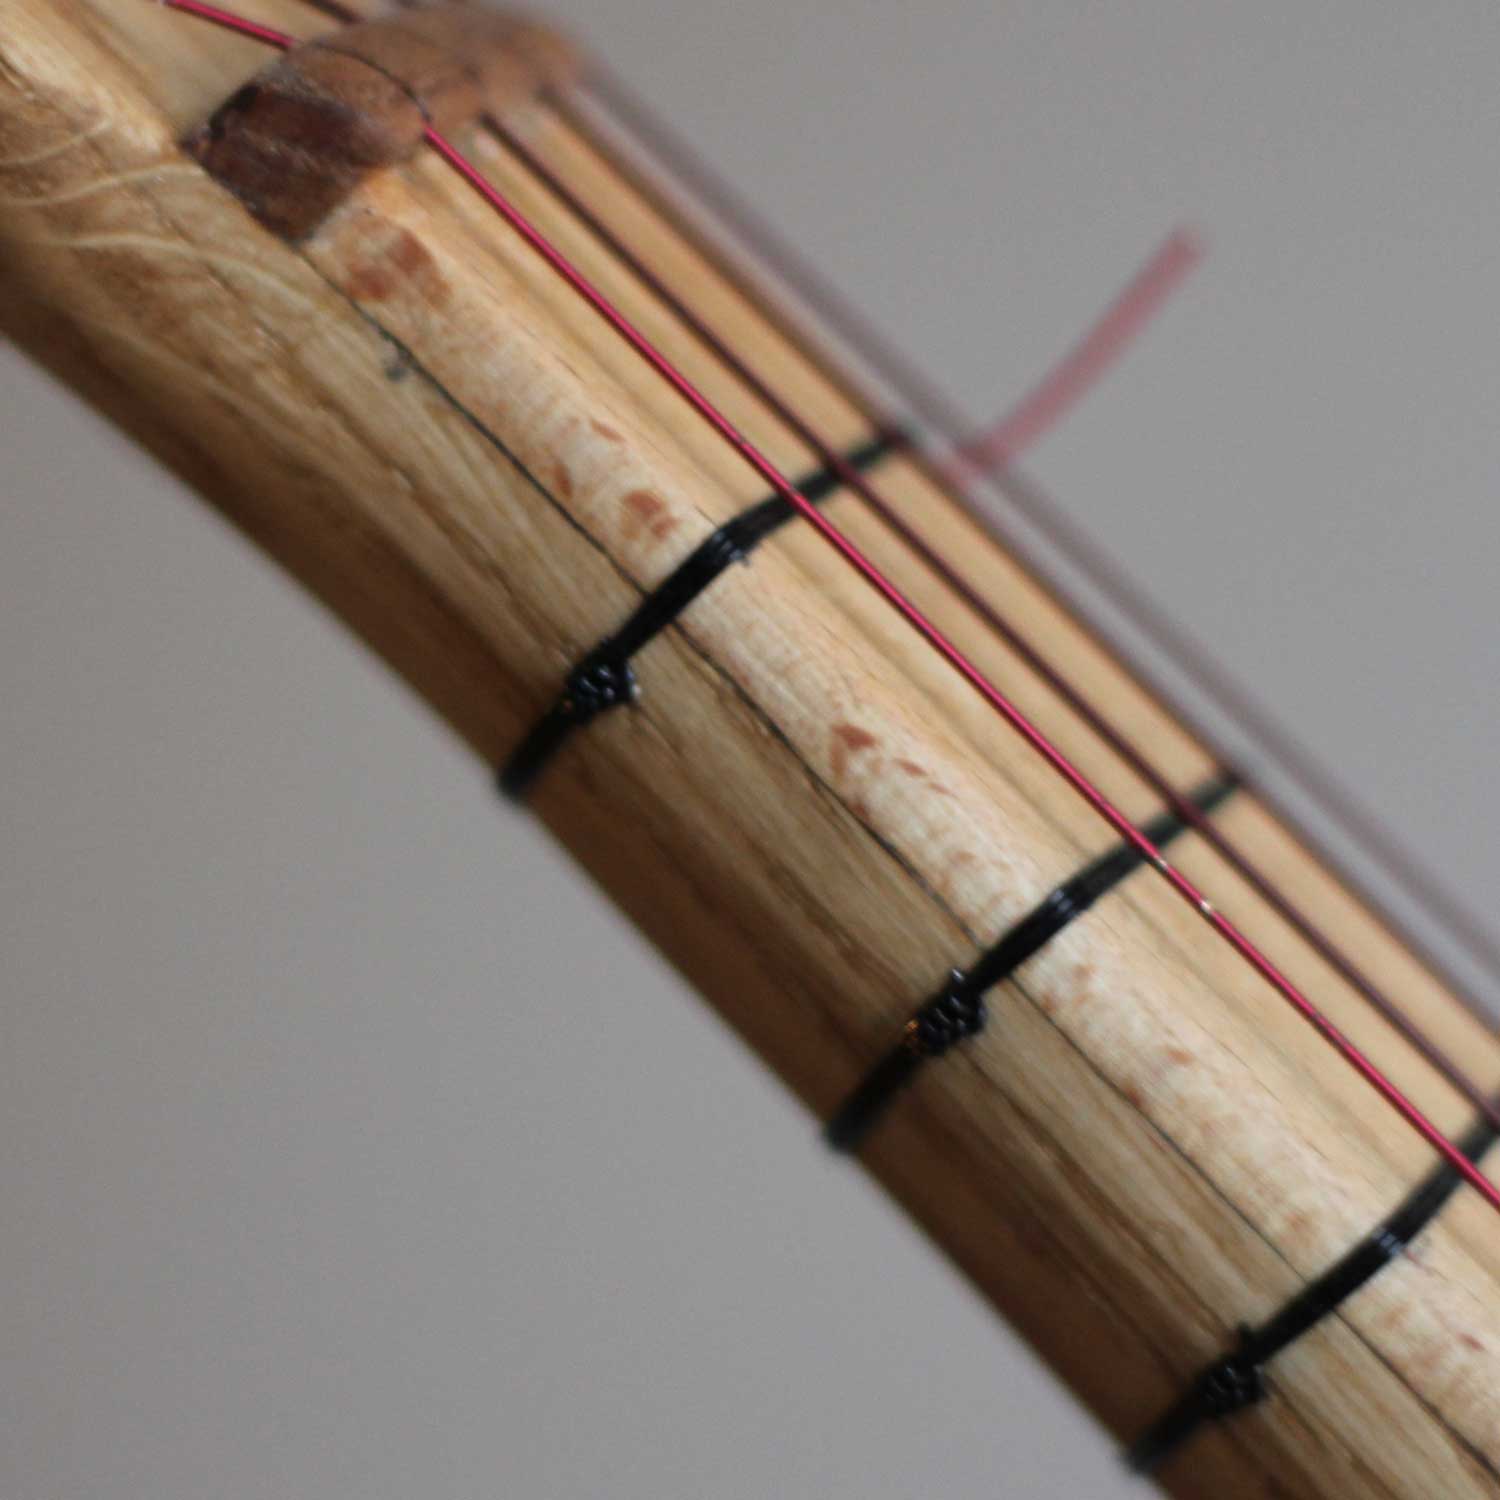
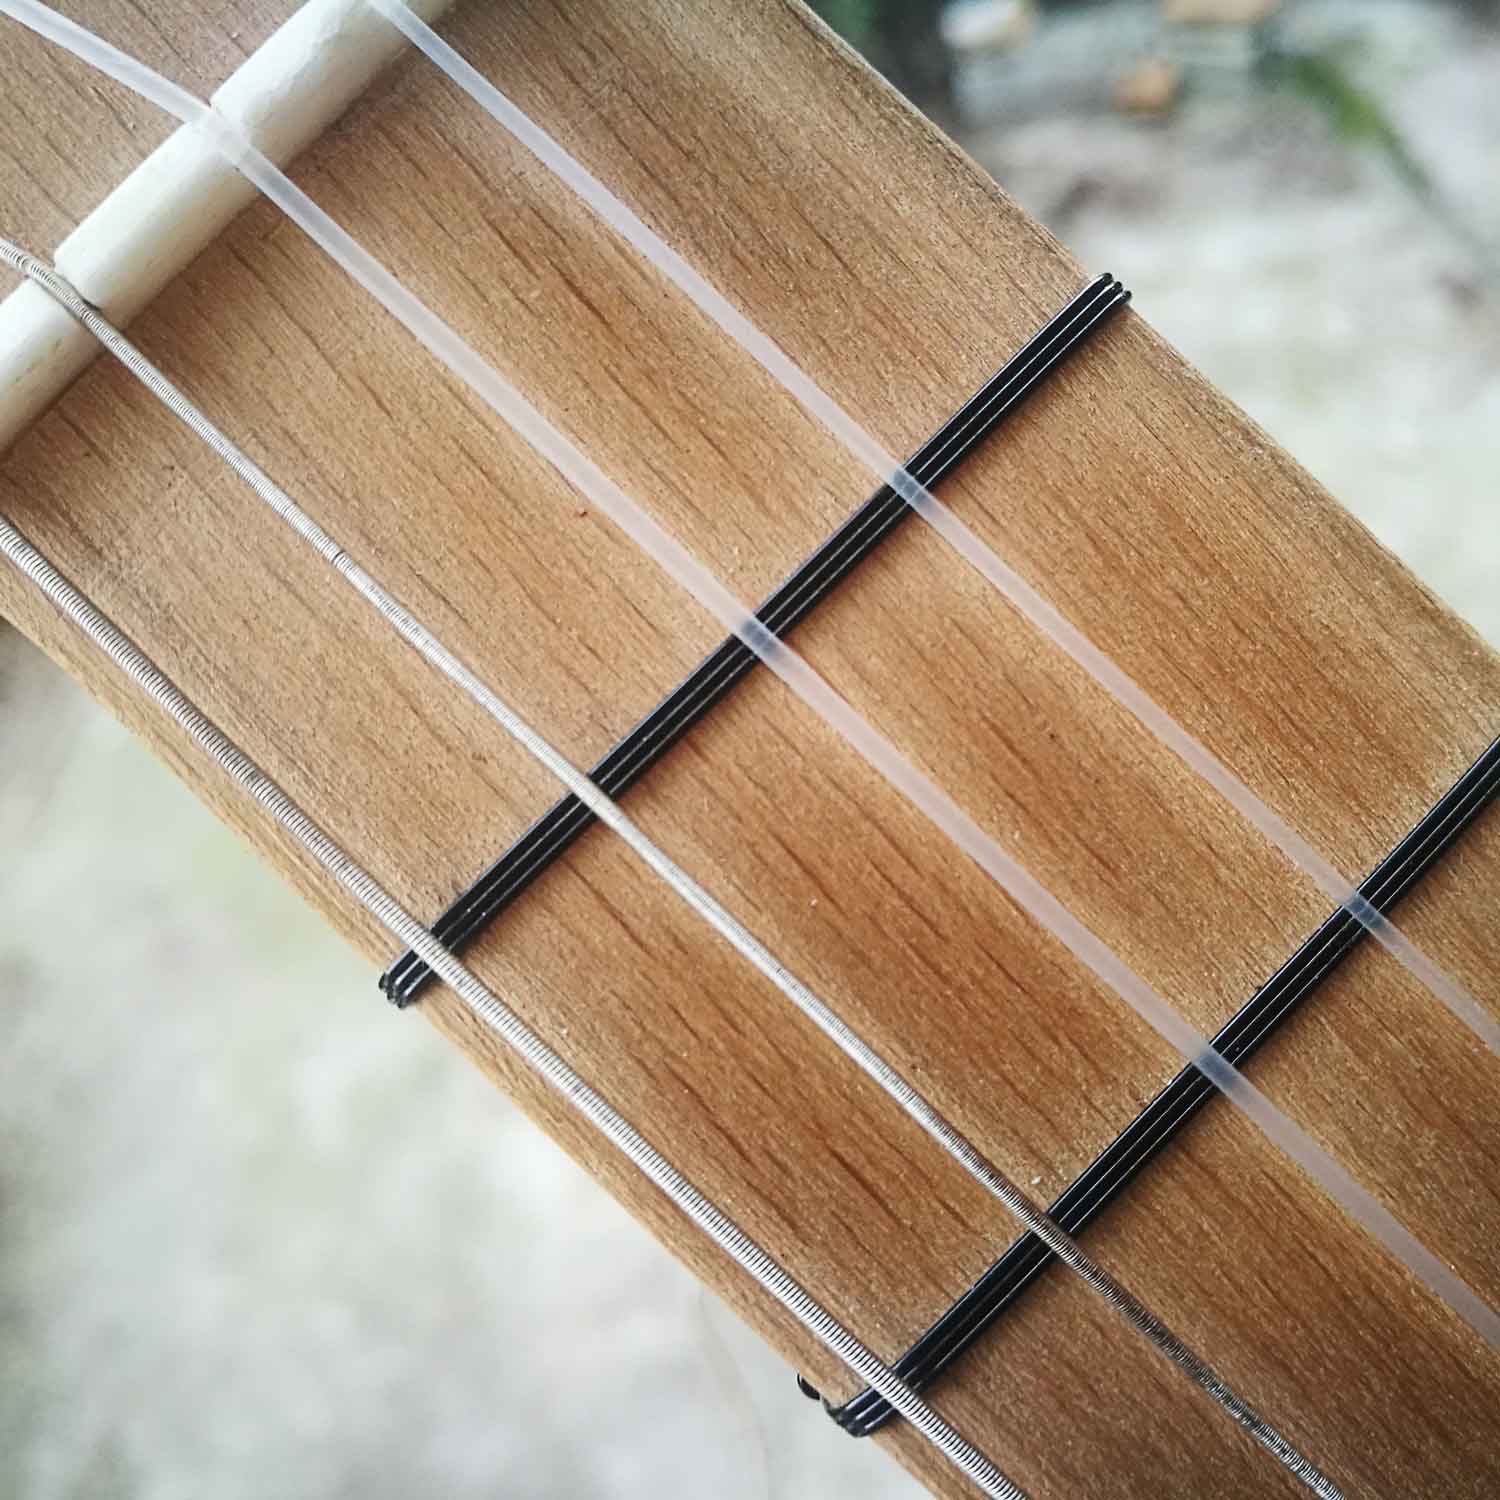
Cable tie frets
~1mm cable ties are probably the easiest option for making frets.
- Can be easily corrected, so that the fret board can be omitted as well.
- Extremely quick and easy to attach.
- Less ergonomic, as you will always feel them while sliding with your hand on the neck.
Strings & tuning
Alright. Let’s jump to this wide topic. It’s important to think from the beginning about what kind of strings do you want, because many things, like the stability of body and neck or the attachment of the strings, are changing with this decision.
And one more tip right before we go into details: Strings are one of the easiest way to improve the sound (also afterwards). If you started with random nylon, a change to professional strings will be drastically remarkable. So if you are not going for full no-budget solutions, consider good strings, even for instruments out of trash.
Metal strings
What to consider, when using metal strings?
- They have a loud and crispy sound. That’s good so far.
- At one end of the string, there is a small ring to attach them to the bridge or the body. There are different ways to do so, more about this in the „bridge“ section.
- Metal strings have a high tension. The body and the neck need to be strong enough, not to bend in time.
- The tuners as well need to be able to stand this high tension.
- Loud, bright sound
- Cheaper than nylon strings
- Metal strings requier more precision on the fretboard
- Your fingers need quite a bit training, otherwise the metal strings can feel quite cutting
- Most string tension. If you are not sure about the stability of your body, better go for nylon strings
Nylon strings
- Less string tension, so better for weaker body and neck constructions.
- The amount of precision needed on the frets is a little lower
- More expensive, compared to steel strings
Phishing line, generic nylon strings
I would say, those are fine for real no-budget trash instruments. I did some Ukes with fishing line, and it’s kind of working. For guitars, you will run in to difficulties finding thick nylon for the lower strings, which are normally wrapped with wire.
Too thin string for a lower note will leave the string with too less tension to sound well. Too thick string for a higher note will just rip the string somewhere
- Cheap or even free!
- Reduced sound quality.
- Hard to find the right thickness for each string in order to have a good tension.
Generic strings, rubber band…
- Just don’t! Doesn’t sound at all or really shitty!
Skale lengh
This is the distance between nut and bridge. More precisely, it’s the length of the free swinging strings.
The measurements below are standards, and you can buy strings for exactly these lengths. Still, you don’t need to stick 100% on these numbers. Making it a little longer will make the strings tighter with a higher risk of breaking. Shortening will reduce the tension, but the sound becomes quieter.
Ukuleles | Scale length | Standart Tuning |
|---|---|---|
| Sopranino | 28 | G C E A |
| Soprano | 35 | G C E A |
| Concert | 38 | G C E A |
| Tenor | 43 | G C E A |
| Guitarlele | 45 | A D G C E A |
| Baritone | 51 | D G B E |
| Guitar Uke | 56 | G C E A |
G C E A is the standard tuning of Ukuleles. This is the same as the 4 higher strings on the fifth fret of a guitar. So you can actually play Uke chords on a guitar as well. From Sopranino till Tenor Uke the tuning is exactly the same. The baritone ukulele is an exception. It is 5 semitones lower and therefore corresponds exactly to the lower four strings of the guitar (only an octave higher).
The guitar ukulele is exactly one octave lower than the standard ukulele. To make this possible, E A D and G strings of a normal guitar string set are used and retuned to G C E A. In order to avoid the string tension becoming too high, the scale length has to be shortened to approx. 53 – 56 cm compared to a normal guitar. Either the high or the low E string of the guitar string set can be used.
Guitars | Scale length | Standart Tuning |
|---|---|---|
| Guitar (steel strings) | 61 | E A D G B E |
| Guitar 4/4 (nylon strings) This is the standart full size | 65 | E A D G B E |
| Guitar 7/8 | 63 | |
| Guitar 3/4 | 58 | |
| Guitar 1/2 | 53 | |
| Guitar 1/4 | 48 | |
| Guitar 1/8 | 44 | |
| Mandoline | G D A E |
Instruments | Scale length | Standart Tuning |
|---|---|---|
| Banjo | 58 – 81 | E A D G B E |
| Mandoline | 33 – 35 | G D A E |
Tuning
Even if guitars have mostly 6 and ukuleles 4 strings, there is no reason to feel limited to this. For example, for an ordinary guitar strummer, it can be quite nice to just make a 5-string guitar and kick the deepest string. For many chords, you are anyway not allowed to use it.
| Standart guitar | E – A – D – G – B – E |
| Standart ukulele | G – C – E – A |
| Open G (for playing with a bottleneck) | D – G – D – G – B – D |
The bridge
The bridge holds and guides the strings on the body’s top. While building your bridge, keep following things in mind:
- The bridge should be light! The heavier it becomes, the more effort it takes from the string to make it vibrate, which lowers the sound. A slim nail, hard wood, or bone are good options in here, but avoid to use big heavy metal screws or similar stuff.
- Use strong material, that absorbs as less vibration as possible. Extreme negative example: a rubber bridge would absorb almost all the sound.
- Choose the right height: Is the bridge too low, the strings will snare on the fretboard, while playing. If it’s too high, it reduces the playing comfort, because of the longer traveling time from string to fretboard. It can lead as well to mistuned sound, because the tension of the string is decently rising while pressing it down.
- Take care of having a proper last contact point, before the string leave the bridge to the nut. Otherwise, you might face with a snaring sound.
- Find the right positioning while knocking on the body’s surface. Install the bridge where you hear the best/ loudest sound.
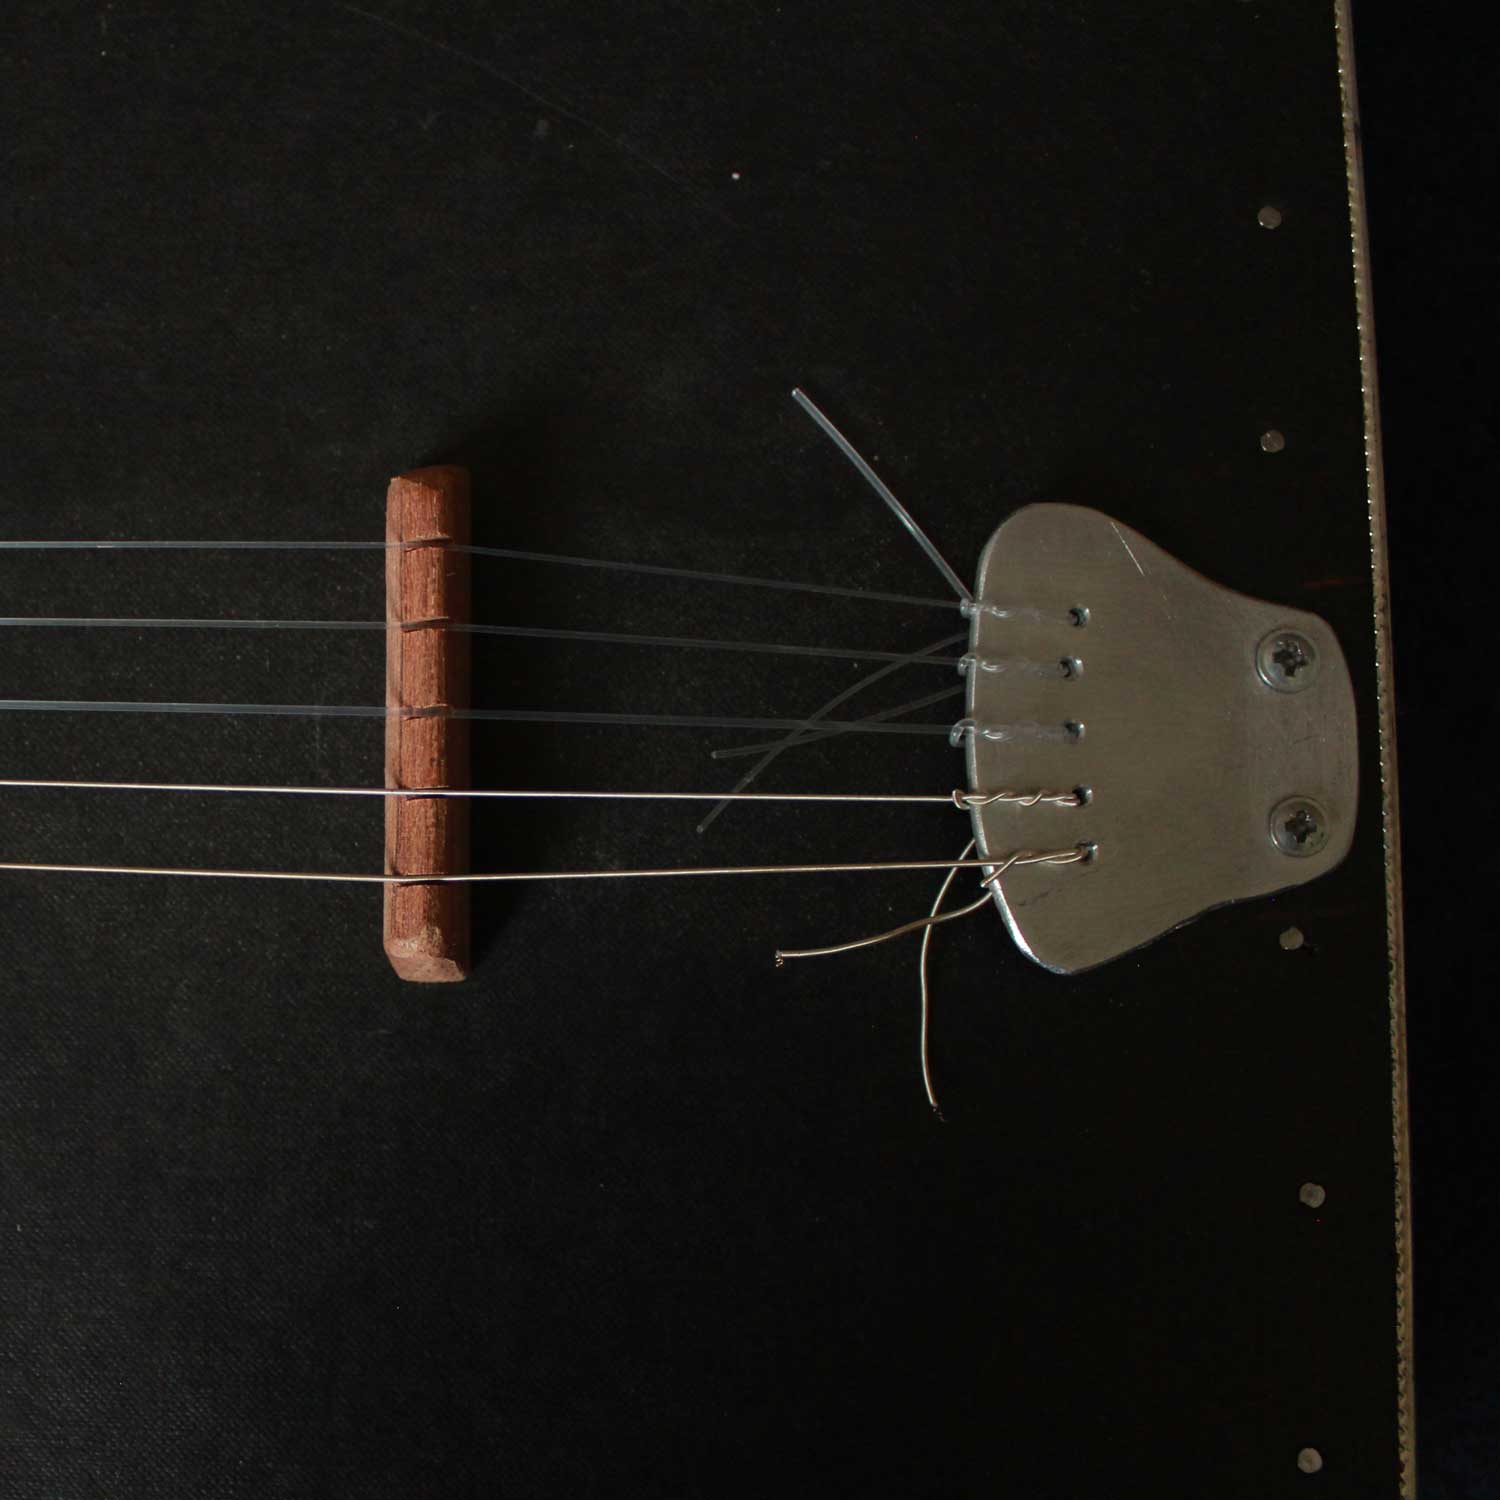
Floating bridge
The strings are hold by a separate string holder, which is attached at the end of the body. The strings are leaded the over the bridge, which is placed on the body.
This method is required for banjo like bodies (when you pull the strings over a „drum“), but works in almost all cases fine.
- When you can hardly glue or screw the bridge to the body, this method is yours!
- Some low budget strings can be too short to reach the string holder.
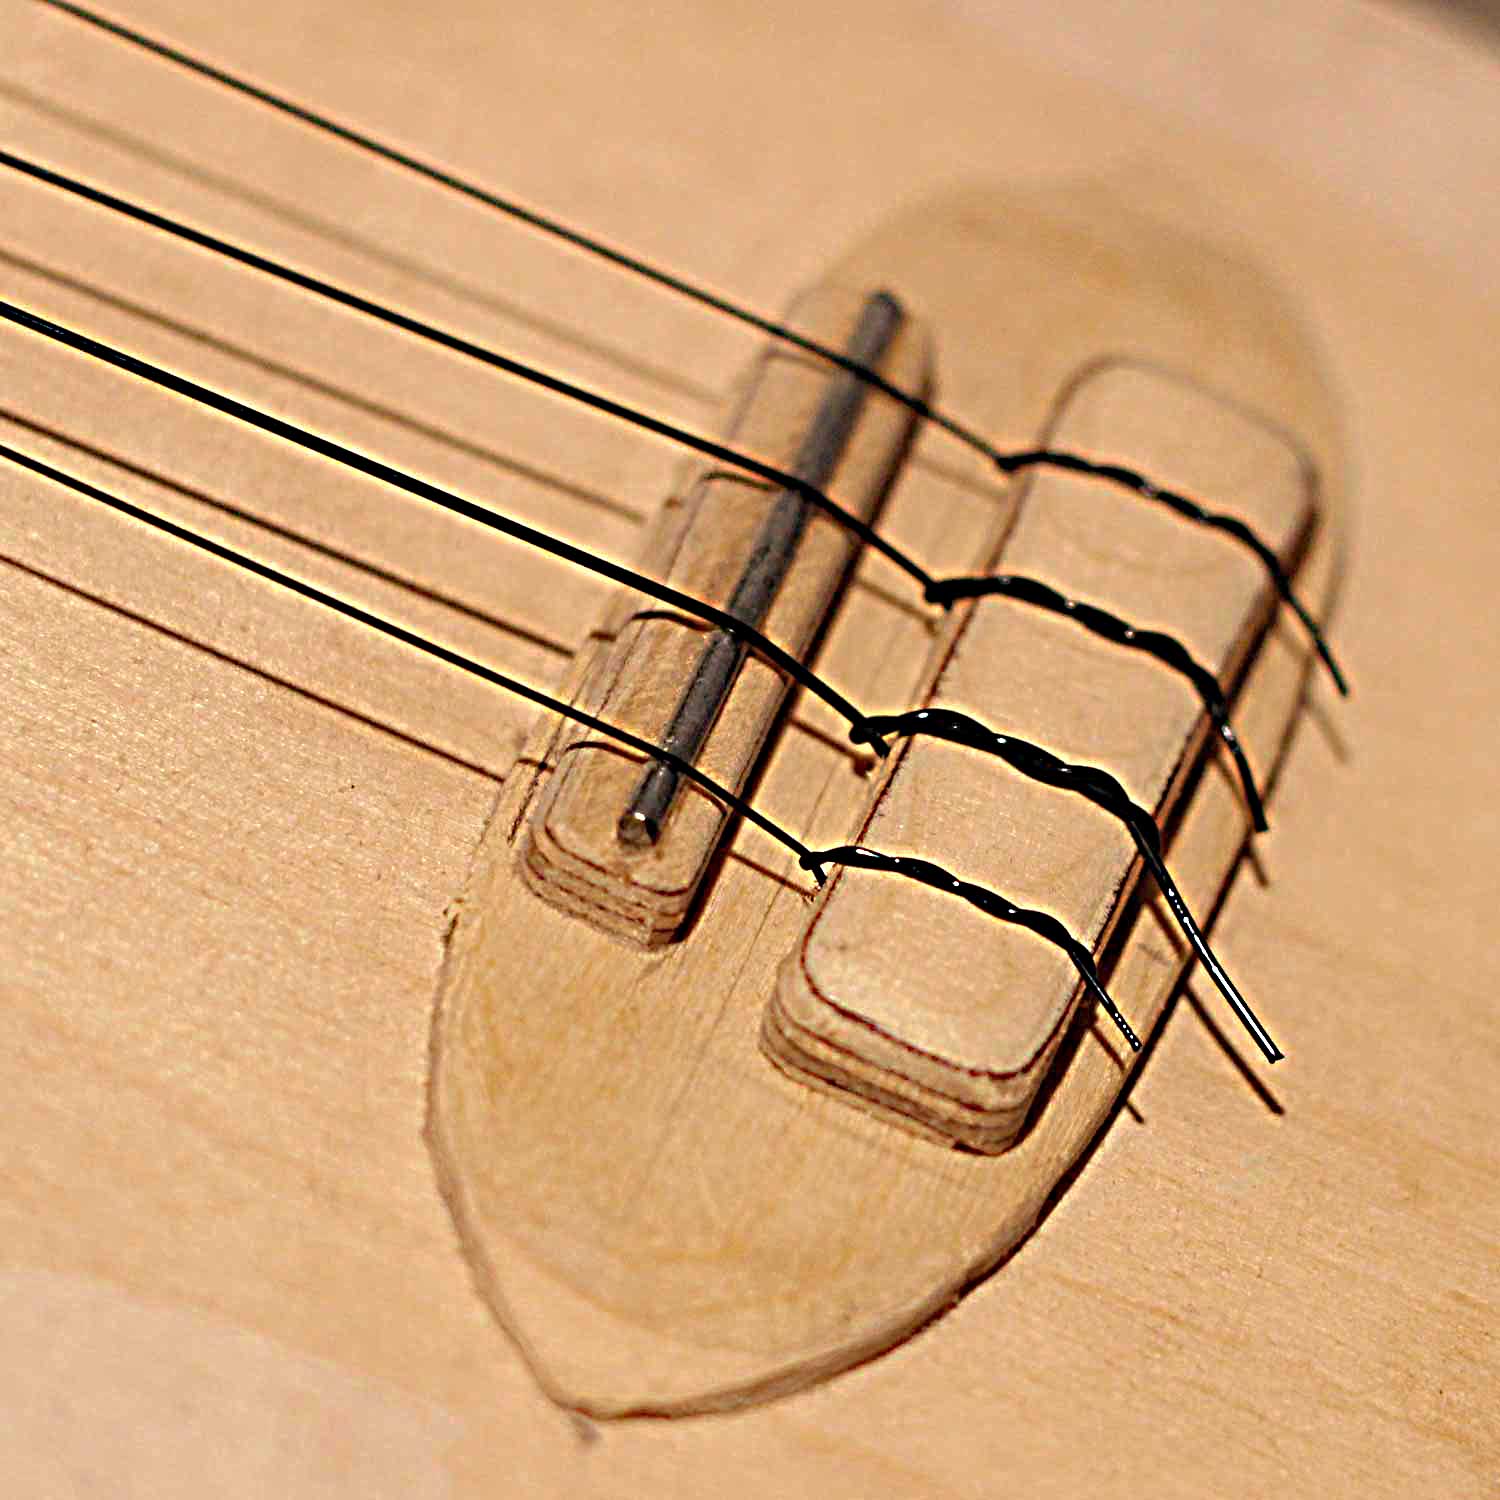
Fixed bridge
This bridge type is directly glued (and maybe reinforced by small screws) on the bodies surface.
- Can be easily just glued to the bodies surface
- Can be unsuitable for non-wooden surfaces.
The body
The sound resonates in the body.
What to take care of, when planning your body:
- The top surface is the most important for the sound. The sides and the back have a very decent impact on the sound. Can be plastic, papier-mâché, of course wood, metal… just avoid sound absorbing stuff like sponges 😉
- If you take closed boxes, cans… check if it has the potential to sound. You can have an idea while knocking the surface or pull a string over with an improvised bridge.
- Take care of statics! If your neck goes down until the very bottom of the body, you can use even paper as body, because the tension of the strings is just on the extended neck. If your neck ends on the bodies top, then your body needs to be durable enough to hold the neck and the strings in tension.
- The bigger your body’s volume is, the more bass you can get out of it.
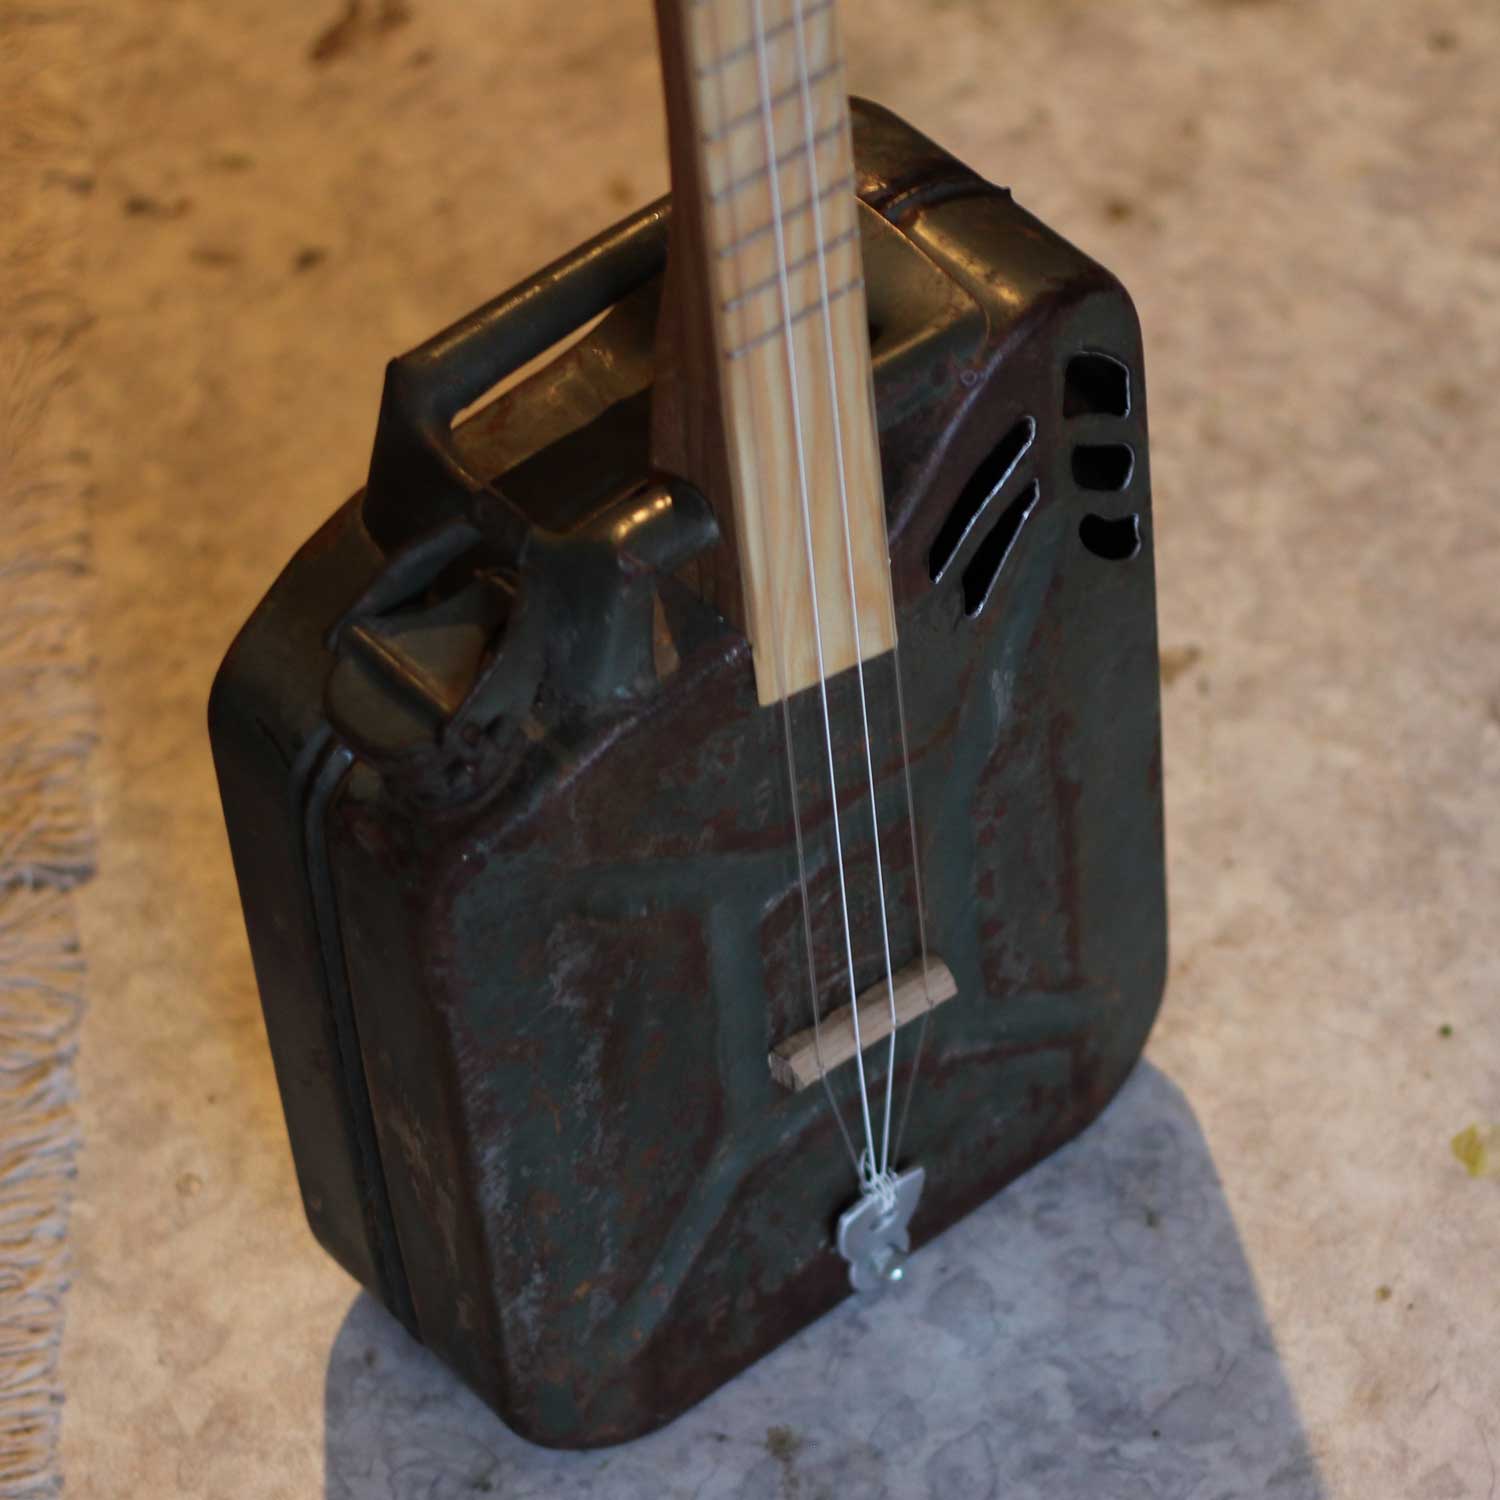
Fuel tank Guitar
Metal fuel tanks are mostly available in 5l, 10l & 20l on the junkyard, in grandparent’s garage or in the regional classifieds. They are rigid enough, to support both: a going through neck and „standard“ neck.
- Undestructable!
- Heavy
- Mostly, you need to pay a little
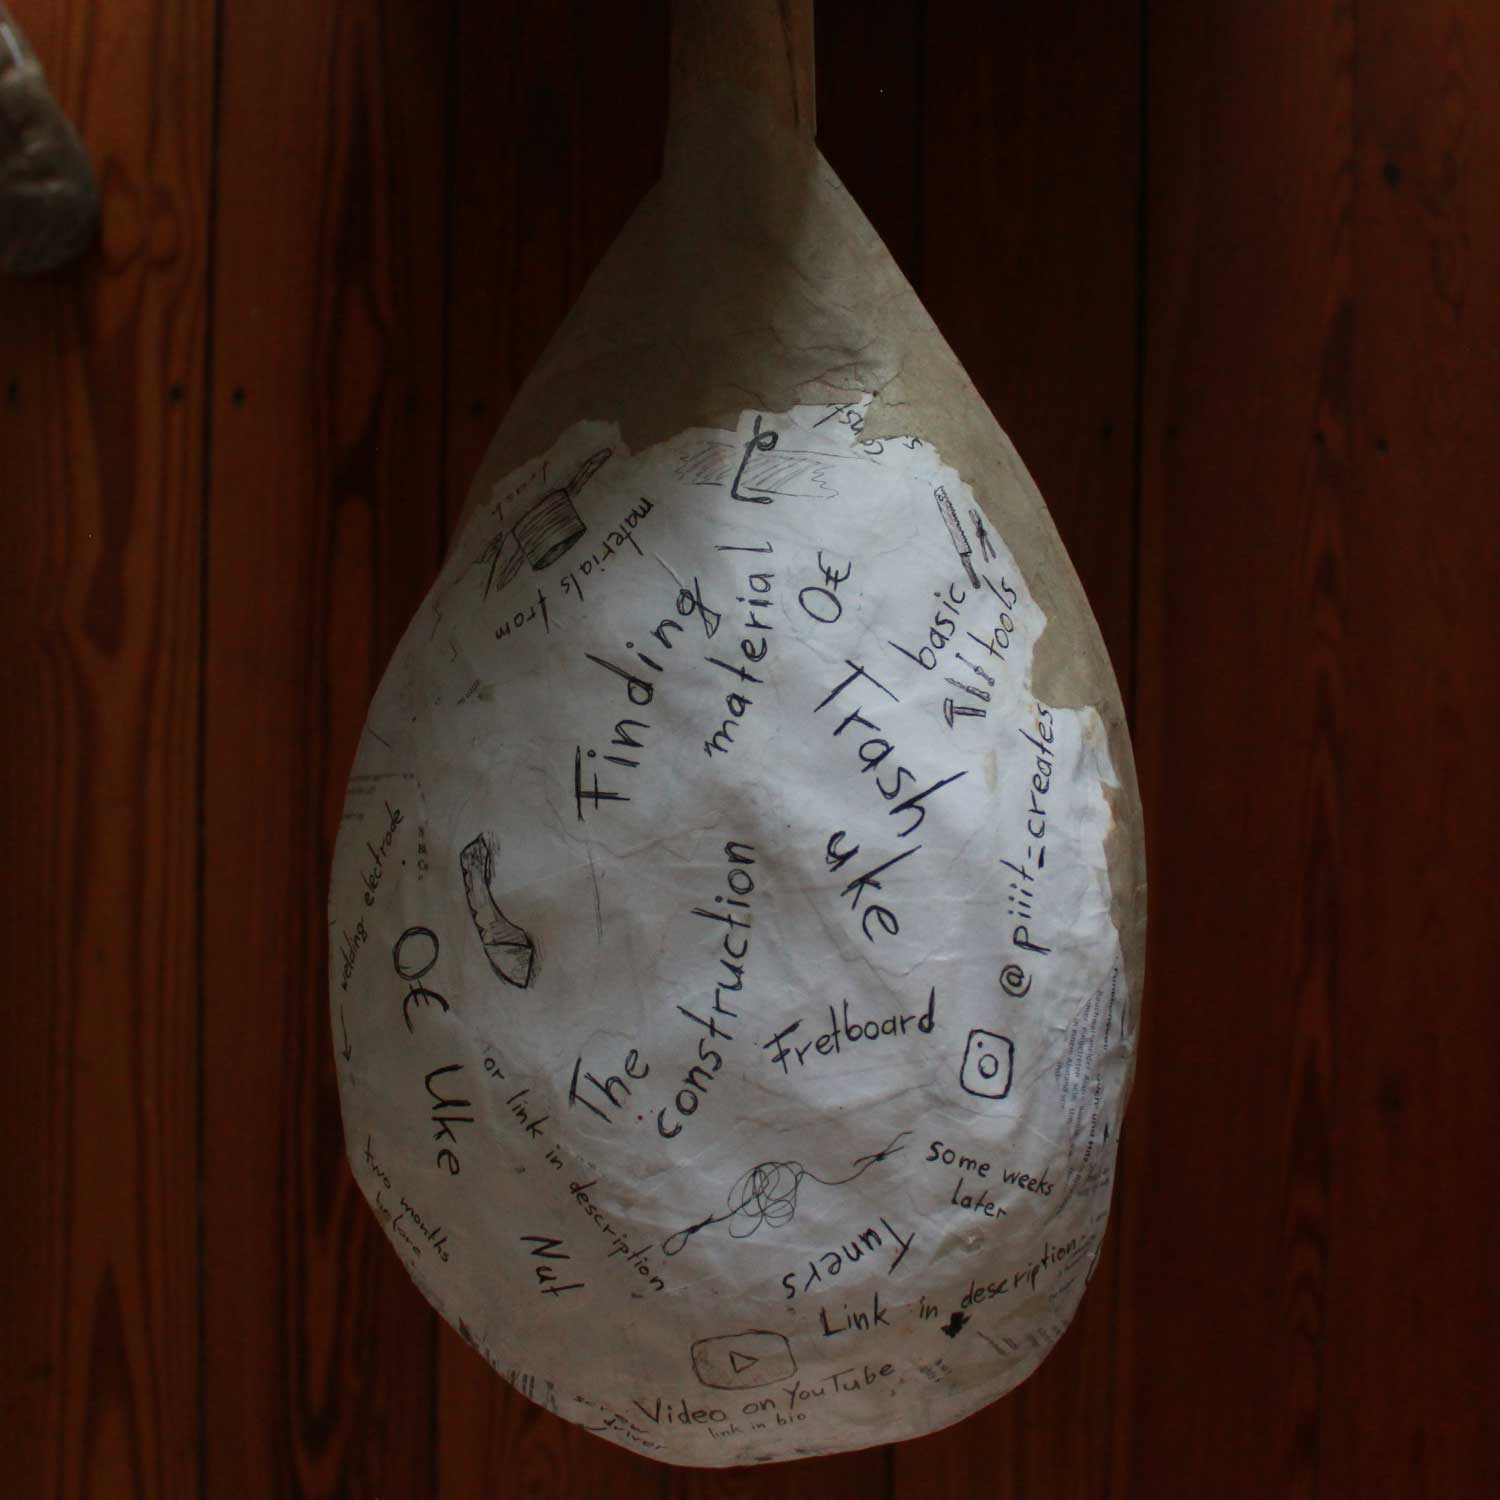
Paper
Yes, it is possible to make a guitar body out of paper, just by sticking many little scraps of paper together. It’s possible to have a wooden plate on the back or have a nice rounded full paper shape.
The top surface of the body stays anyway paper, so you will have a good sound.
- Cheap and easy.
- You are super free in shaping the body!
- Not that super over solid, but if you treat it like a normal guitar, nothing gonna happen. (And even if, it’s just paper. You can fix it with ease)
- Paper mache takes a bit of time.